- Adding Images to a Product
- Manipulating Images in the Design Tool
- Adding Text to a Product
- Manipulating Text in the Design Tool
- Additional Design Tool Functionality
- Image FAQ: Accepted Image Formats, Colour Profile Specs and More
We’ve made creating or adding a design to one of our products even easier.
Who needs a run-of-the-mill, off-the-shelf product when you can create something wholly unique for yourself or a loved one? We’ve made our ‘create your own’ experience more intuitive so you can better customise products we offer here in the Zazzle marketplace.
Creating a Zazzle product begins with adding an image and/or text to a product.
WORKING WITH IMAGES >
Click the ‘Add Image’ button to apply an image to your product.
If you are not logged into your Zazzle account or if you’re new to Zazzle and haven’t previously had an account, you’ll go to the following screen after you click ‘Add Image.’
If you haven’t already opened an account with Zazzle or already signed into your Zazzle account, we recommend that you do so now.
We also suggest that you click on the ‘Open full image browser’ button as shown above, to see all the different ways you can add images and text.
Adding Images from Your Computer
If you are logged in to your Zazzle account and have previously added images to your Zazzle ‘My Images’ folder, you’ll see all of those images populated in under ‘All Images.’ (See below)
If you’ve never added images to your Zazzle account, you’ll see that you can start adding image files by dragging and dropping them into the open area so they can begin uploading. (See below)
If you don’t have an image on your computer that you want to upload, there are other things you can do.
Adding Images from the Zazzle Icons bar
You can add any of our free Zazzle Icons to create your own design. (See below)
Editing Zazzle Icons
After you add a Zazzle Icon, click into the design element and you’ll bring up further ways to edit that image. (See below)
![]()
Adding Images from ‘My Mobile Phone’
You can also upload images directly from your Mobile Phone by either going to www.zazzle.co.uk/upload (or the equivalent url for your relevant domain) in the browser of your mobile device. You can also scan the QR code shown. (See below)
After you’ve chosen the image you wish to upload, you’ll see it appear in your design area, as well as how it looks on the product you’ve chosen in a preview window. (See below)
If you’re having trouble uploading an image, please visit here.
MANIPULATING IMAGES IN THE DESIGN TOOL
IMPORTANT: You must click within the design in the design area to see the right side of the screen populate with other ways to add to and edit your design. (See below)
You can also add multiple design elements to your design area. As you can see below, there are three components to the design: the dog, the pink polka dots and the text ‘Mandy,’ each on a separate layer.
Filter an Image
You can change the ‘Filter’ of the layer you’re highlighting. (See below)
Crop an Image
You can Crop the image of the layer you’re on. (See below)
‘Fill’ the Design Area with an Image
You can take your design and have it ‘Fill’ the entire design area, all the way to the bleed line. If an image is wider or taller than the dimensions of the art view area, it may result in the zooming and cropping of the image.*
*Note: The above image is a different dimension than the design area so zooming and cropping have occurred.
‘Fit’ an Image in the Design Area
Or you can ‘Fit’ all of your design within the ‘print safe’ area defined by the blue lines. ‘Fit’ takes the longest edge of the image and elongates that edge to either the vertical or horizontal print line. This will ensure that the image is not cropped. (See below)
You can ‘Scale’ your image down by using the ‘Minus’ (-) button or scale your image up by using the ‘Plus’ (+) button. (See below)
You can ‘Rotate’ your image to the left or right using the arrow keys, or you can be more precise and type in the exact degree of rotation you would like. (See below)
You can also ‘Flip’ your design. The button on the left flips the design horizontally – so what was once on the left is now on the right and vice versa. (See below)

And can also flip the design vertically – so what was originally on the bottom is now the top and so on. (See below)
More Image Options
Whites as Transparent
Under ‘More Options,’ you can show ‘Whites as Transparent.’ That means, like your printer at home, our system processes white portions of images and omits them. So if you choose to make your whites transparent, you can assume that all white areas within your design will assume the colour of the product they are placed on. (See below.)
Make object(s) permanent and always visible
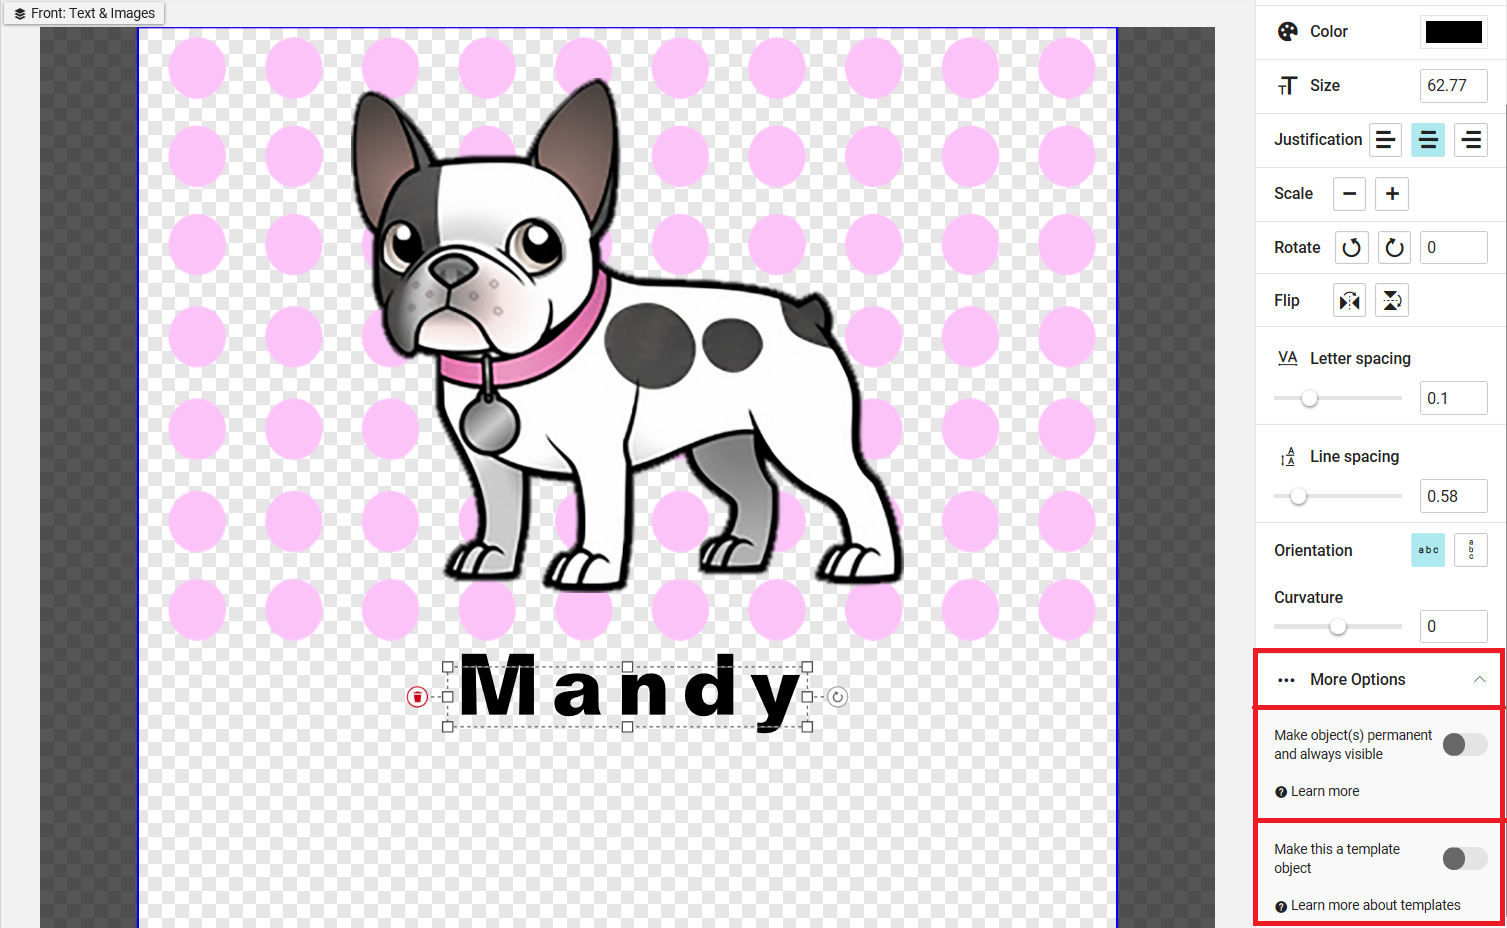
Also under ‘More Options’ is ‘Make object(s) permanent and always visible.’ This means that a customer can move or scale your image on the product, but they can’t remove it from the design area. (See below)
‘Make this a template object’ is a tool designed for advanced users who wish to create templates for others to add content to. For more information on this functionality, click here.

WORKING WITH TEXT >
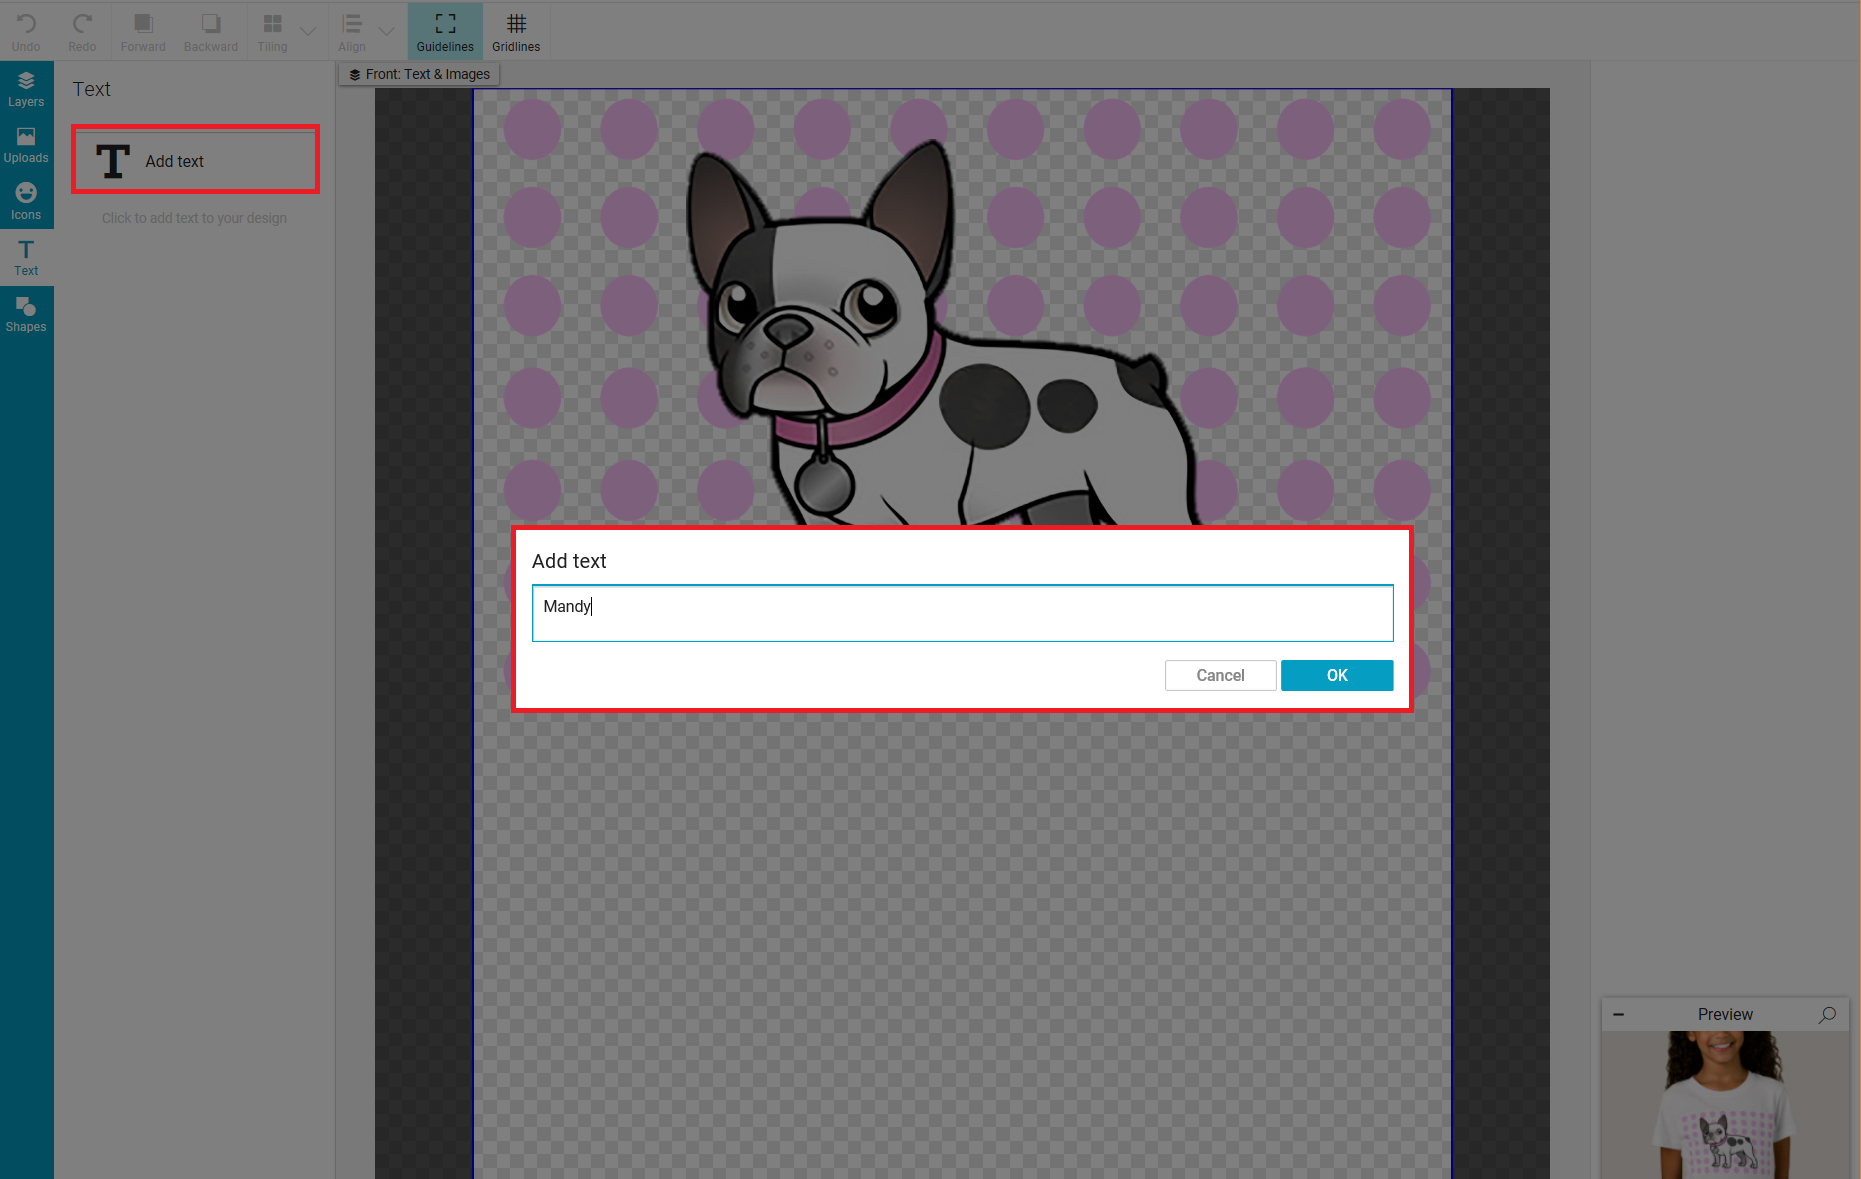
To add text to the design area, click ‘Add Text’ and type the word or words you’d like. (See below.)

MANIPULATING TEXT IN THE DESIGN TOOL
IMPORTANT: You must click within a text layer in the design area to see the right side of the screen populate with other ways to add to and edit your text. (See below)

Change Font Type
You can change ‘Fonts.’ (See below)

Change Font Colour
You can change the ‘Colour’ of the font. (See below)

Change Font Size
You can change the ‘Size’ of the font. (See below)

Justification of Text
You can set the ‘Justification’ for the text to be left, centre or right-hand justified. (See below)

Scale, Rotate and Flip Text
You can Scale, Rotate and Flip your text just as you would an Image as described above. (See below)

Letter Spacing
You can add to or subtract the distance between each letter by using the ‘Letter Spacing’ functionality. Use the slider or add a precise number and select the distance you want each letter from one another. (See below)

Line Spacing
With ‘Line Spacing,’ you can determine how far apart you want each line of text from one another. Use the slider or add a precise number and select the distance you want each line from one another. (See below)

Line Orientation
You can also have the ‘Orientation’ of your text either be horizontal or vertical. (See below)

Add Curvature to Text
You can add ‘Curvature’ to your text – either up or down. Use the slider or add a precise number to indicate the amount of curvature you’re looking for. (See below)

Under ‘More Options,’ you can do with text like you did with images – Make (text) object(s) permanent and always visible and Make this (text) template object. See above on how it works for images. (See below)

ADDITIONAL DESIGN TOOL FUNCTIONALITY
Layers
There are three layers to the design below: the dog, the pink polka dots and the text ‘Mandy.’
If you want to change the order of the Layers and say, put the polka dots on top of the dog, you can just drag and drop each layer in the order you’d like them. (See below)

Backward/Forward
You can also move layers ‘Backward’ and ‘Forward’ depending on the layer you’re highlighting and/or clicked on within the design area. (See below)

Undo/Redo
If you make a mistake or you like how your design looked before you made that last tiny change, you can ‘Undo’ or ‘Redo’ last steps. (See below)

Tiling
If you’d like to take an element of your design and make it a pattern, you can tile it in a number of different ways. You can also stipulate the size you want each duplicate tile to be in inches. (See below)

Align
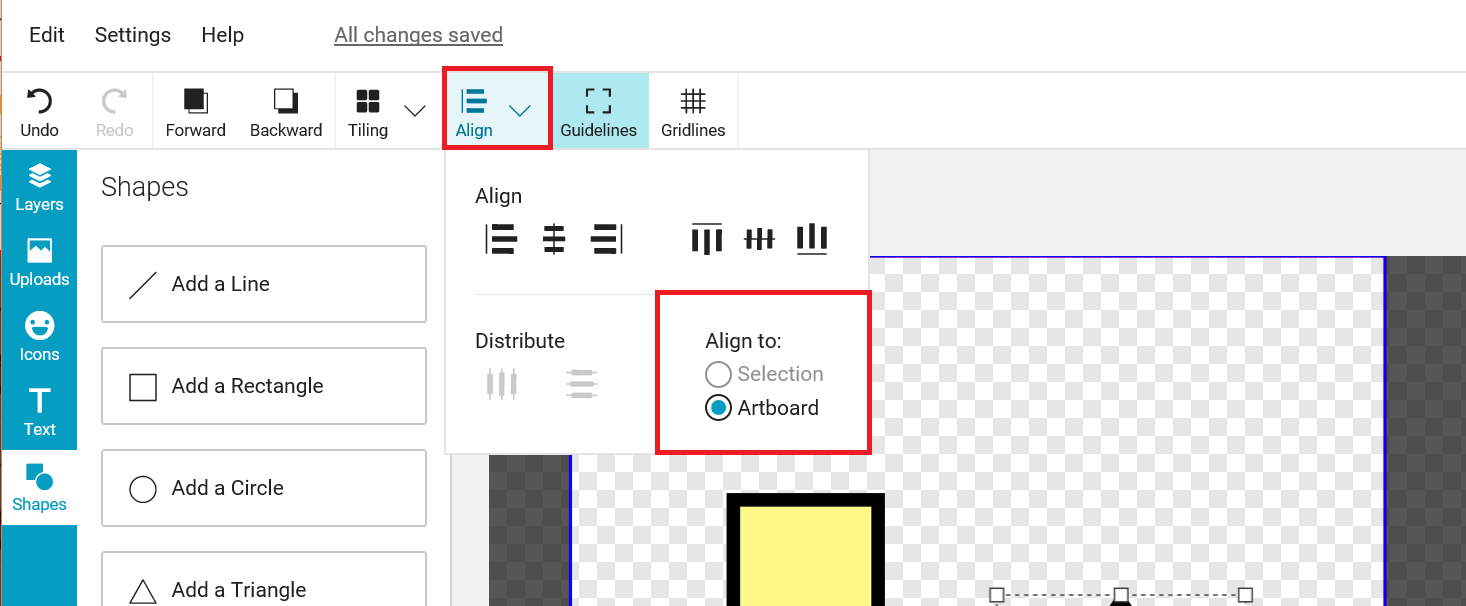
‘Align’ lets you line up multiple images to one another in different configurations.
First, decide if you want to align a layer to another layer or layers or if you want to align all the layers within the artboard or design area itself. (See below)

Next, let’s say you have six coloured shapes that are all over the place and you want them aligned and evenly spaced. (See below)

First, hold down the Control key and then use your cursor and click on all of the shapes, grouping them. You know that the objects that you want to align are grouped when there is a dotted-line encompassing all those shapes. (See below)

Then you can choose to either vertically align the objects or horizontally align them. (See below)
The following example shows that the shapes have been vertically aligned across their centres. (See below)

Distribute
Now, if you wanted to distribute those shapes an equal distance from each other, you could either choose to horizontally or vertically space them out.

The following example shows that the shapes have been vertically distributed evenly across their centres. (See below)

Guidelines
It’s a good idea to keep ‘Guidelines’ on so you know where your print safety area is. Anything part of the design that goes beyond the blue lines may be compromised when printed. (See below)

Gridlines
Turn ‘Gridlines’ on to help you measure and distribute assets evenly across your design area. (See below)

Image FAQ: Accepted Image Formats, Colour Profile Specifications & More
For more creator specific information regarding the creation of images, formats and specifications, please click here.
For complete access to our guide files for all Zazzle products, please click here.