- Het toevoegen van een afbeelding (upload of kies uit je Zazzle afbeeldingen)
- Het bewerken van afbeeldingen in de designtool
- Het toevoegen van tekst aan een product
- Het bewerken van text in de designtool
- Aanvullende designtool functies
- Veelgestelde vragen: geaccepteerde afbeeldingsformaten, kleurprofiel en meer
*Geüpdate voor de nieuwe designtool 1/16/2019
We hebben het ontwerpen of toevoegen van een design op een van onze producten nu nog makkelijker gemaakt.
Wie heeft er nu behoefte aan iets wat je overal kan kopen en vrijwel overal hetzelfde eruit ziet? Maak het zelf en geef het een echt persoonlijke swing. Zazzle helpt je hier uiteraard graag bij verder om het proces nog leuker en makkelijker te maken.
Het ontwerpen van een Zazzle product begint met het toevoegen van een afbeelding en /of tekst op een product.
WERKEN MET AFBEELDINGEN >
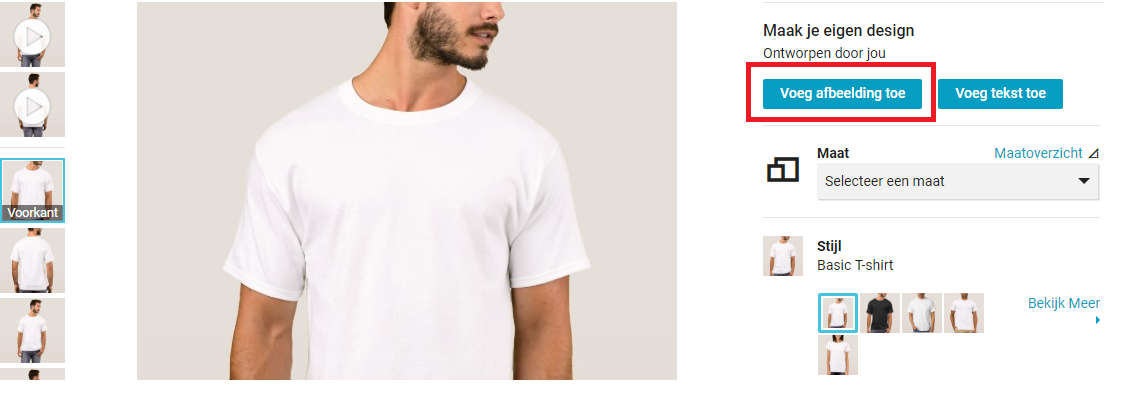
Klik op 'Voeg afbeelding toe' om een afbeelding aan je product toe te voegen.
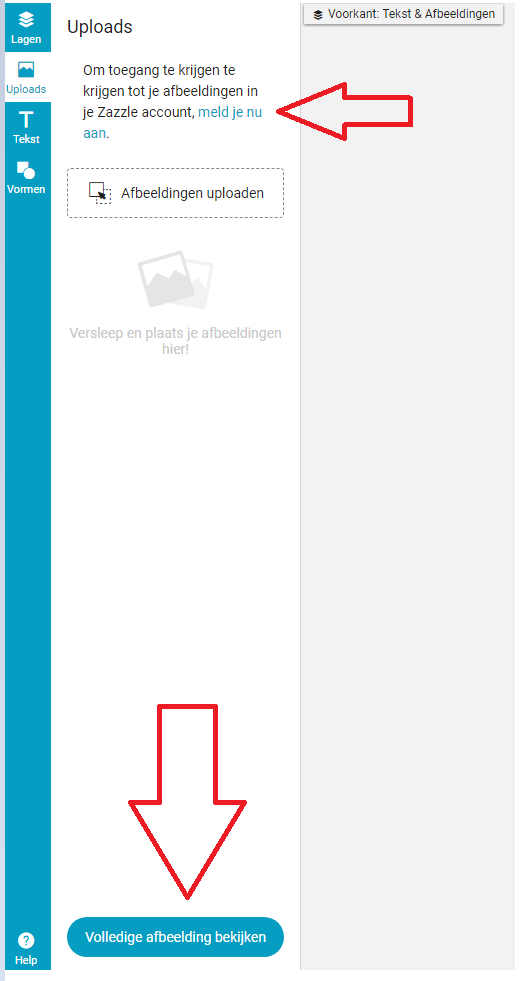
Als je niet bent ingelogd op je Zazzle account, of Zazzle is helemaal nieuw voor je en je hebt nog niet eerder bij ons een account gehad, dan kom je na het klikken op de 'Voeg afbeelding toe' optie bij de volgende pagina terecht.
Als je nog geen account hebt geopend op Zazzle, of nog niet hebt ingelogd, dan raden we je aan om dat nu te doen.
We raden tevens aan om te klikken op de 'Volledige afbeelding bekijken' optie om alle verschillende manieren te bekijken hoe je afbeeldingen en tekst kan toevoegen.
Afbeeldingen toevoegen vanaf je computer
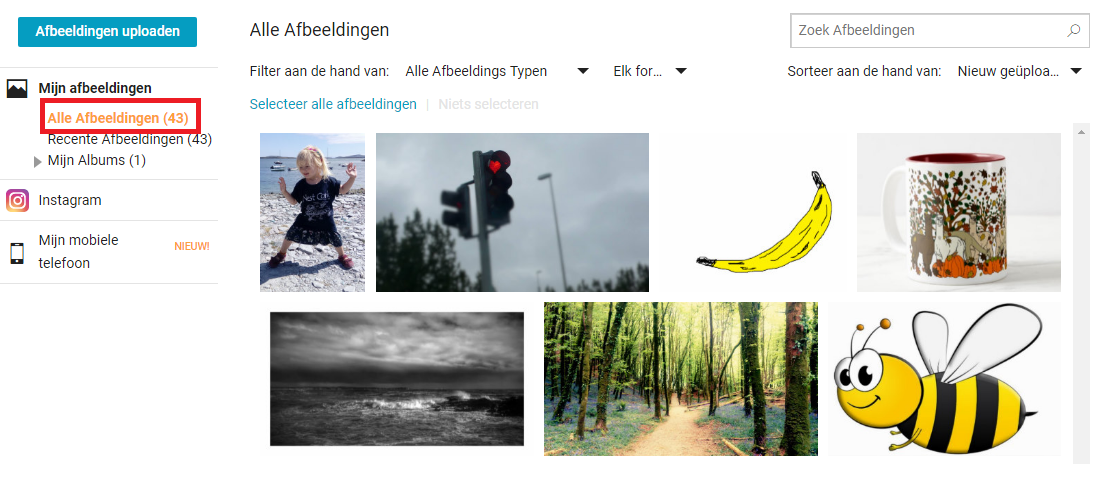
Als je staat ingelogd op je Zazzle account en je hebt eerdere afbeeldingen toegevoegd aan je Zazzle 'Mijn afbeeldingen' folder, dan kun je al deze afbeeldingen terugvinden onder 'Alle afbeeldingen.' (Zie onderstaand)
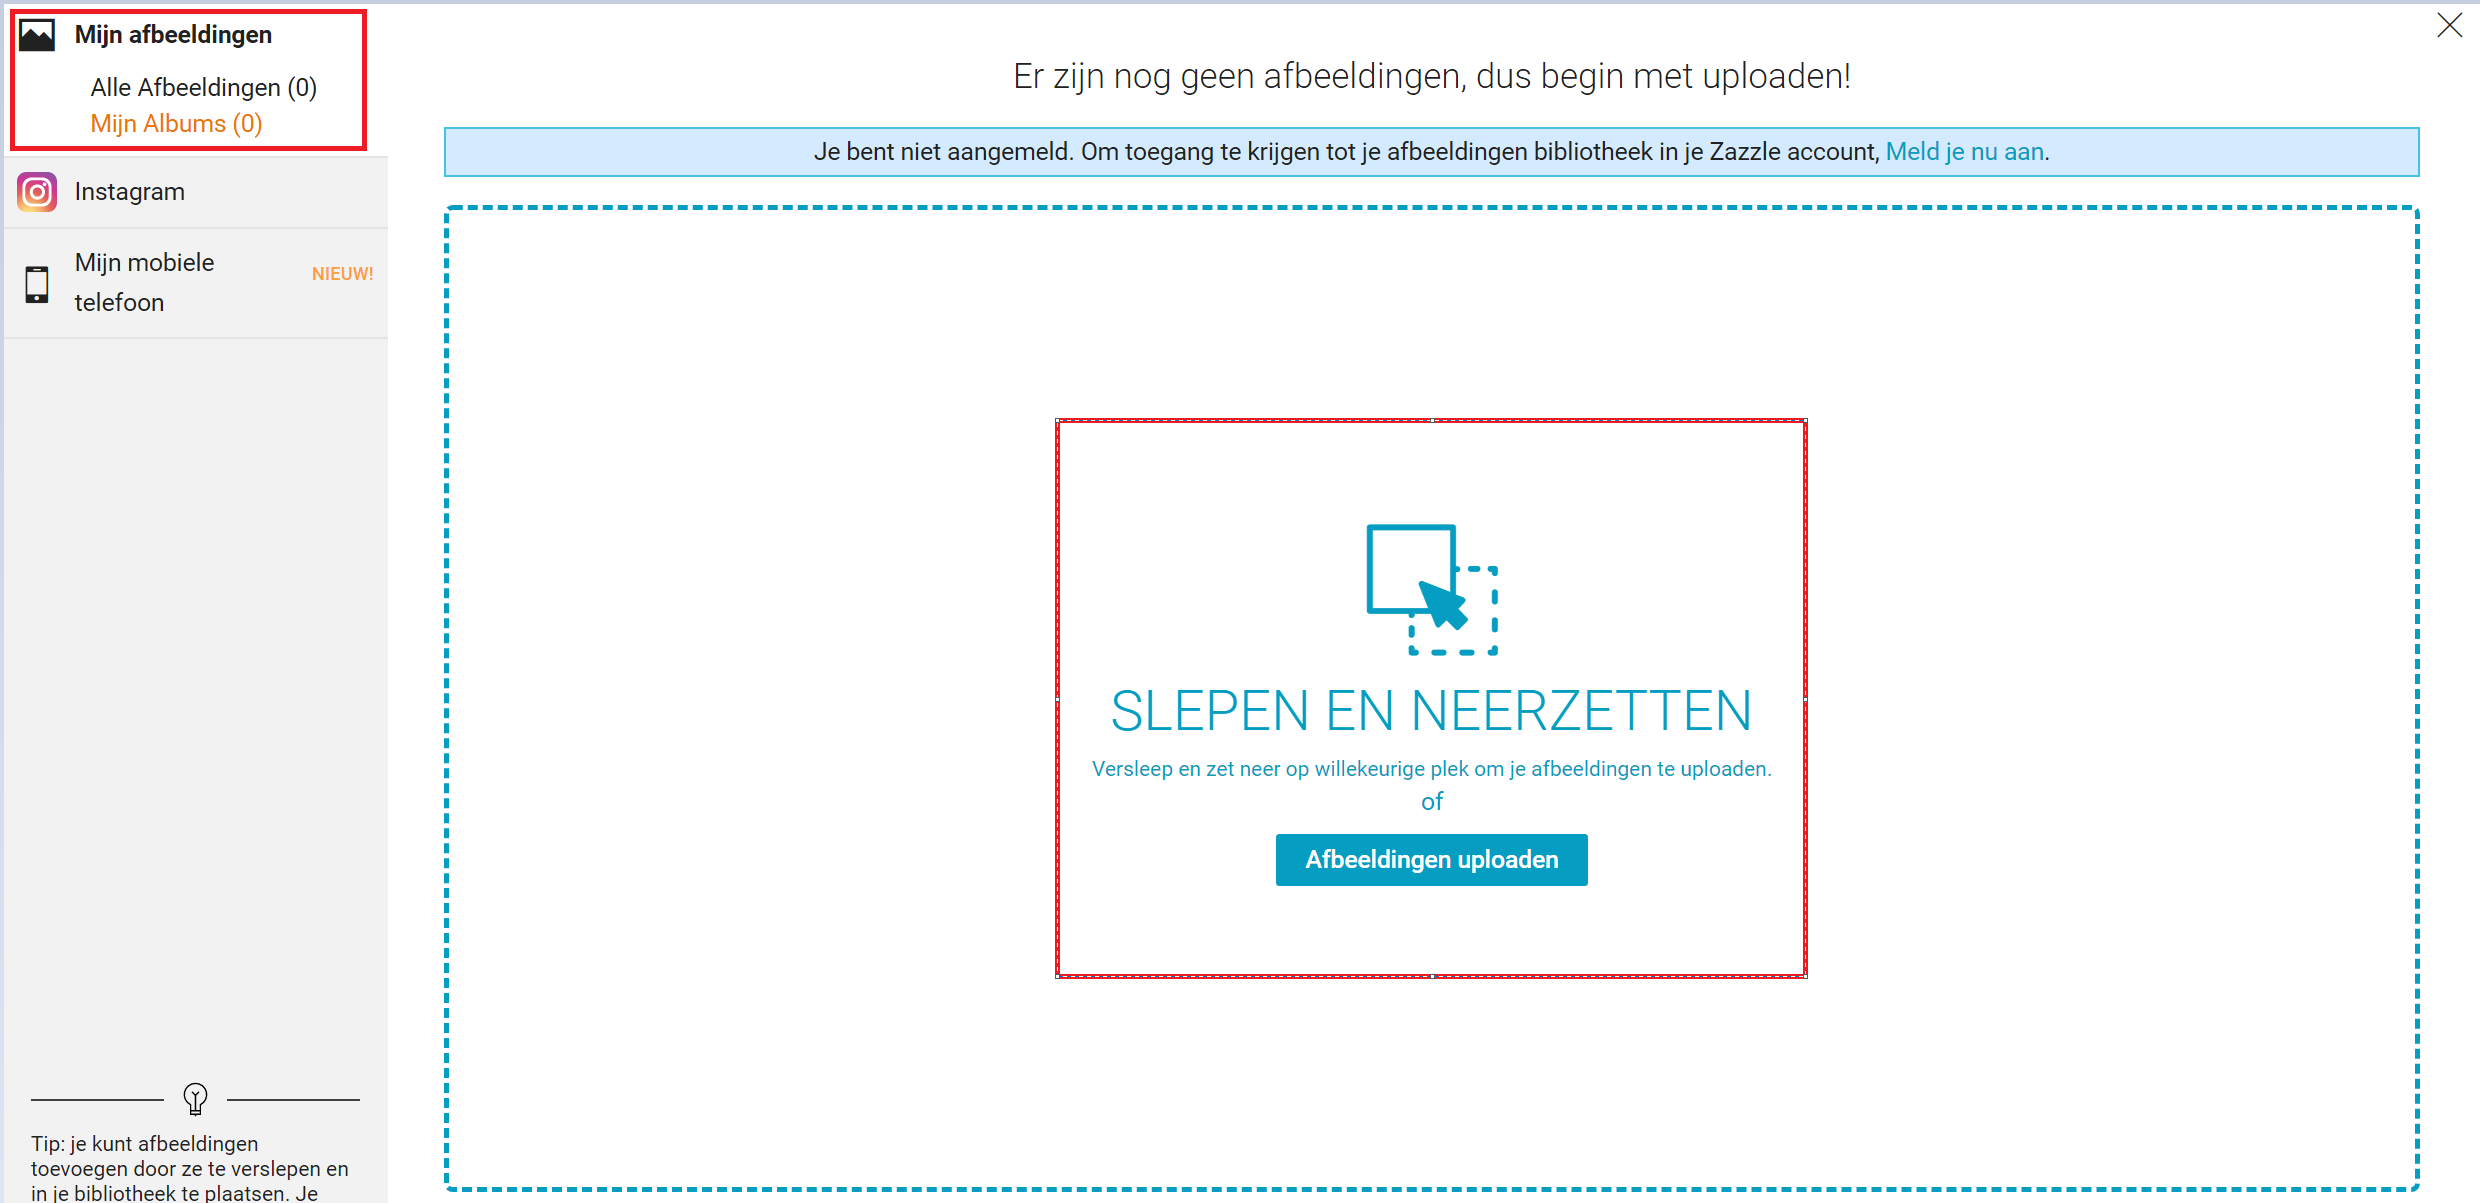
Als je nog nooit afbeeldingen aan je Zazzle account hebt toegevoegd, dan zul je zien dat je afbeeldingen kan toevoegen door ze te slepen en verplaatsen in de open ruimte zodat ze kunnen worden geüpload. (Zie onderstaand)
Mocht je geen afbeelding op je computer hebben die je wilt uploaden, dan zijn er andere mogelijkheden.
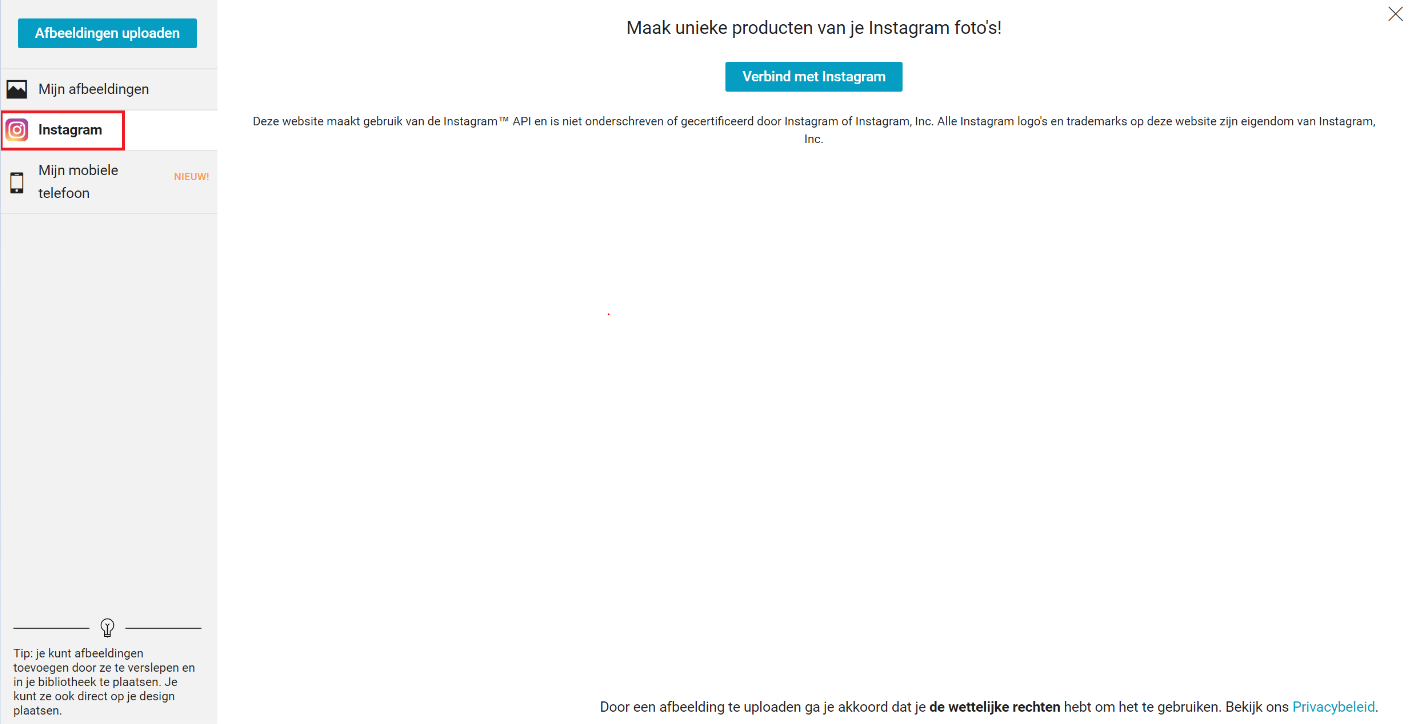
Het toevoegen van afbeeldingen van je Instagram account
Je kunt een foto of design uploaden vanaf je Instagram account nadat je bent ingelogd. (Zie onderstaand)
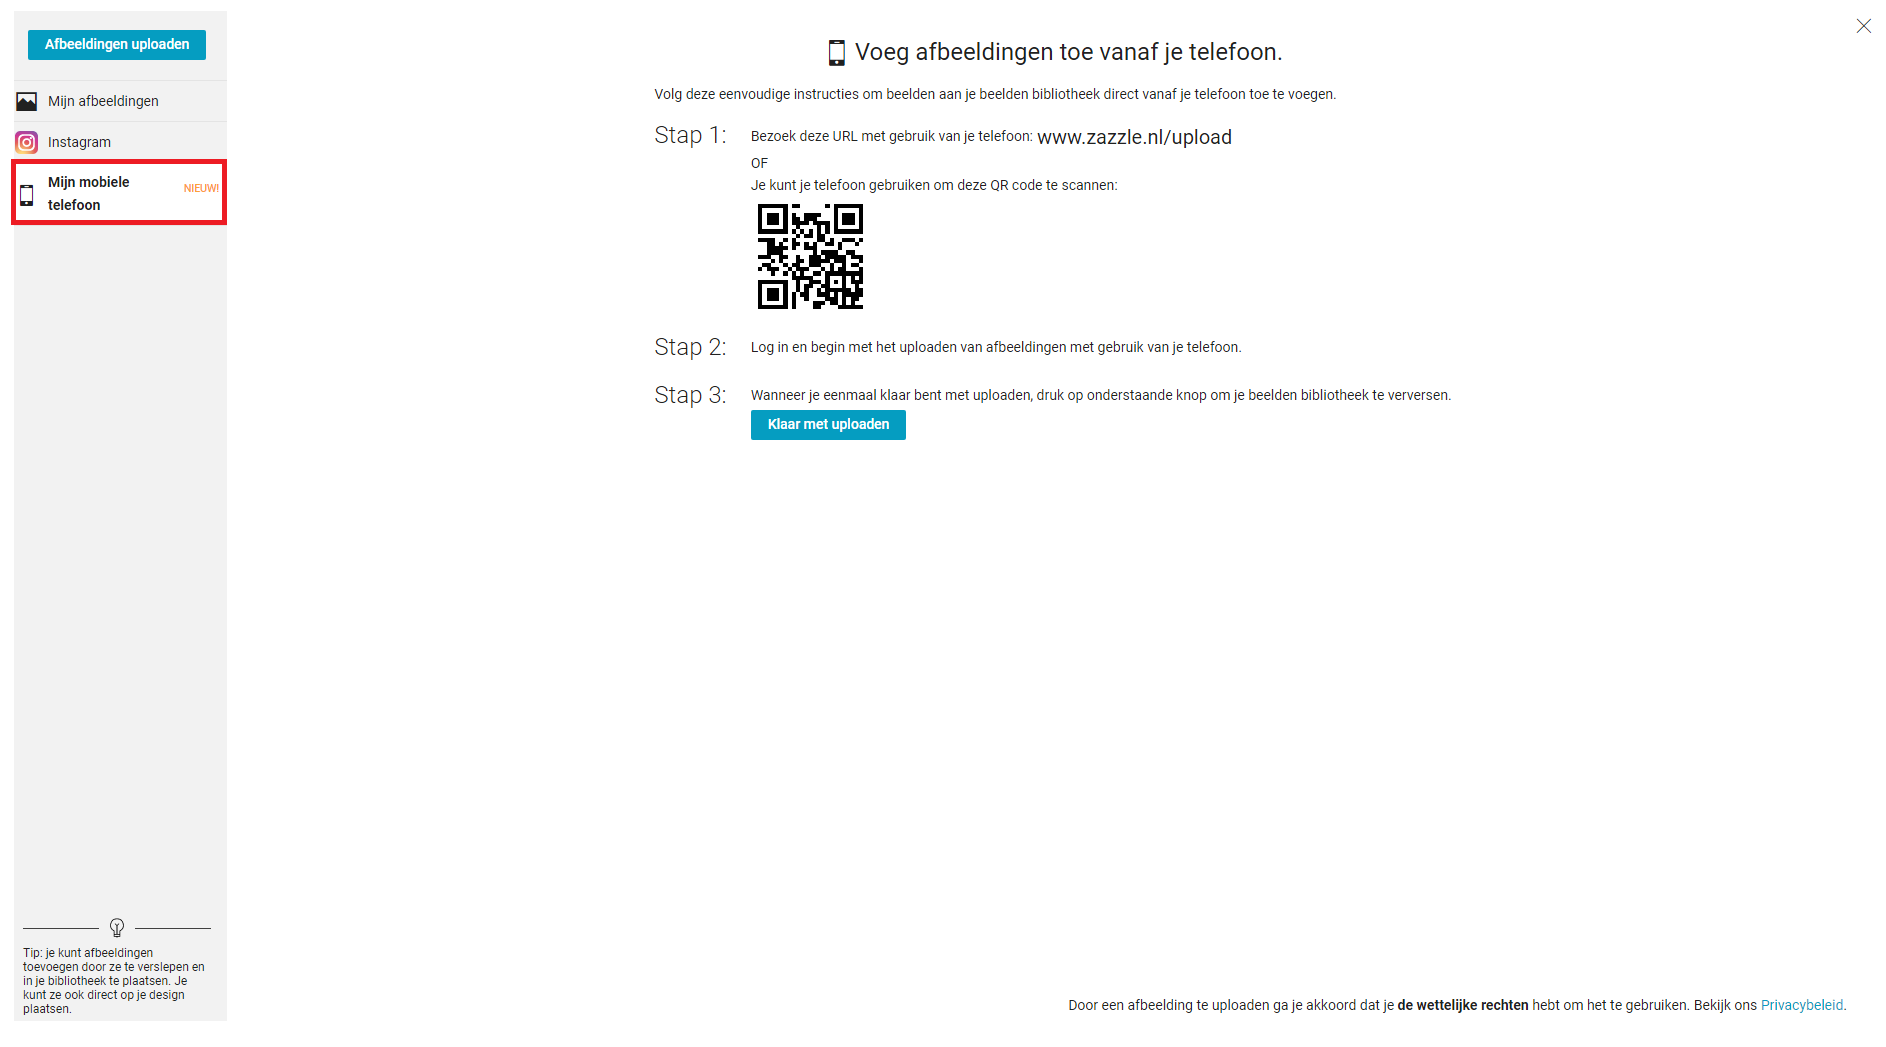
Het toevoegen van afbeeldingen vanaf 'Mijn mobiele telefoon'
Je kunt afbeeldingen ook direct vanaf je mobiele telefoon uploaden door op je mobiel te surfen naar www.zazzle.nl/upload of de onderstaande QR code te scannen.
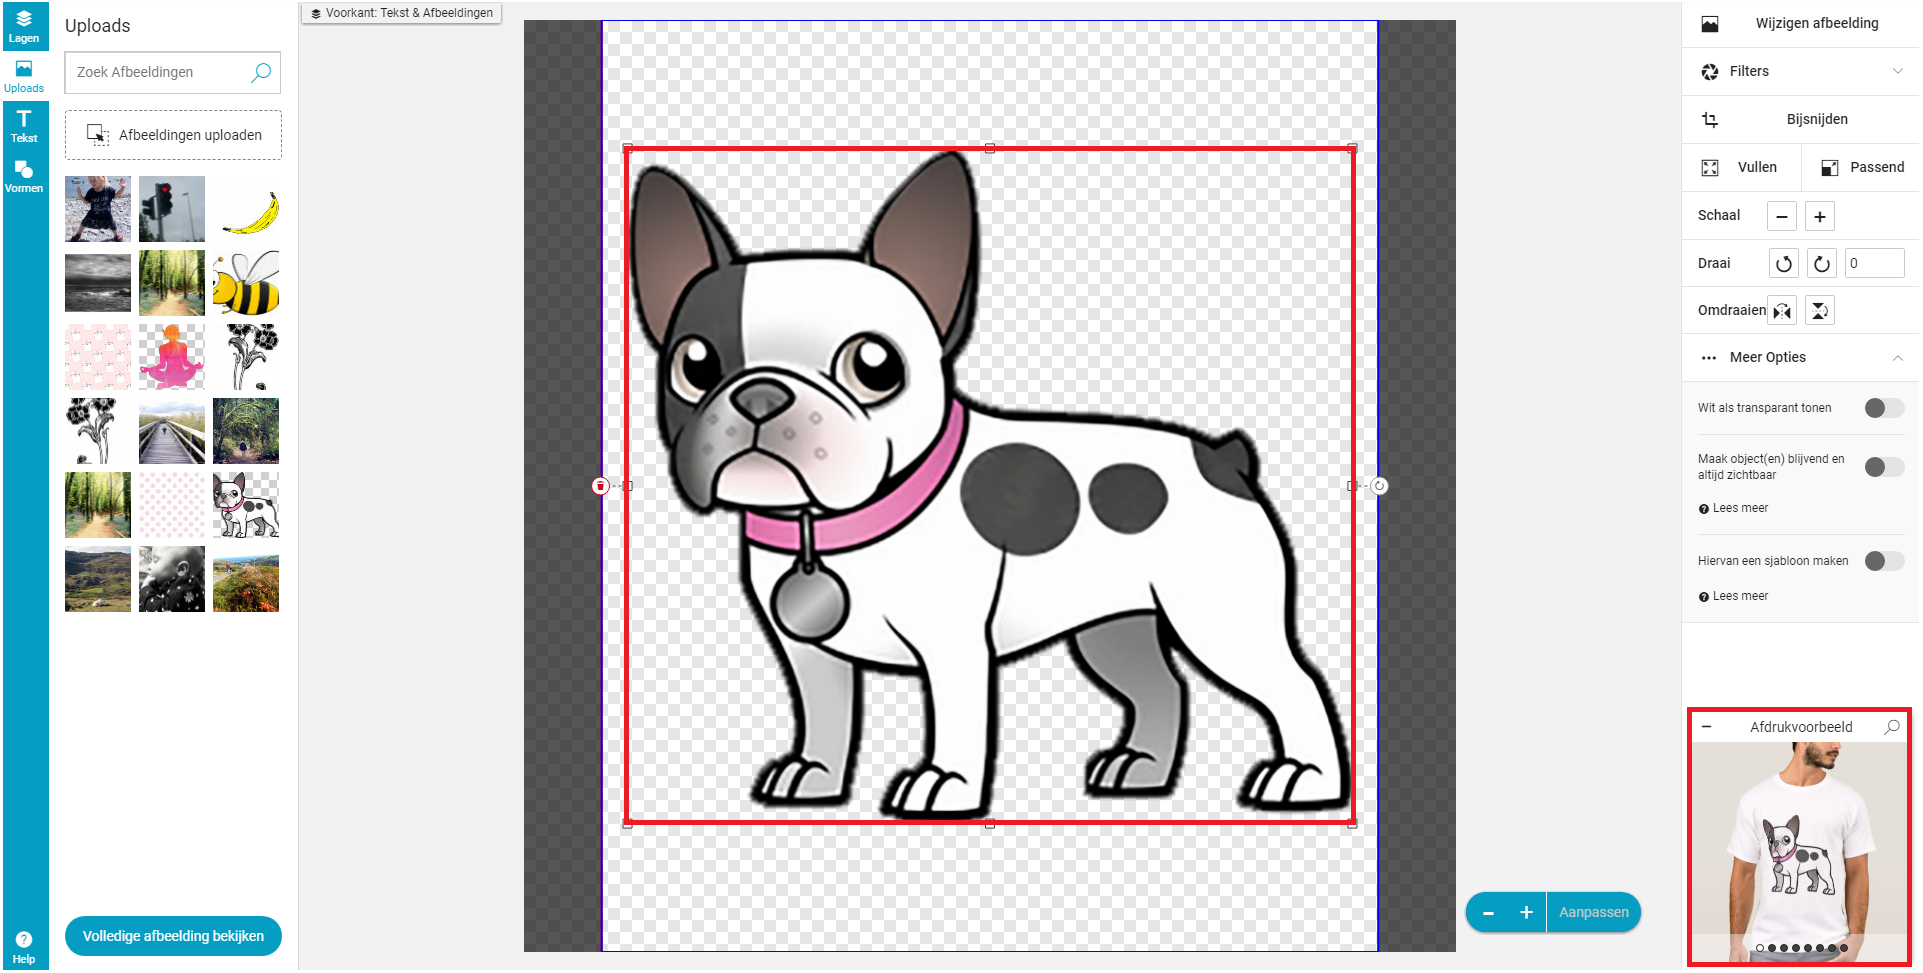
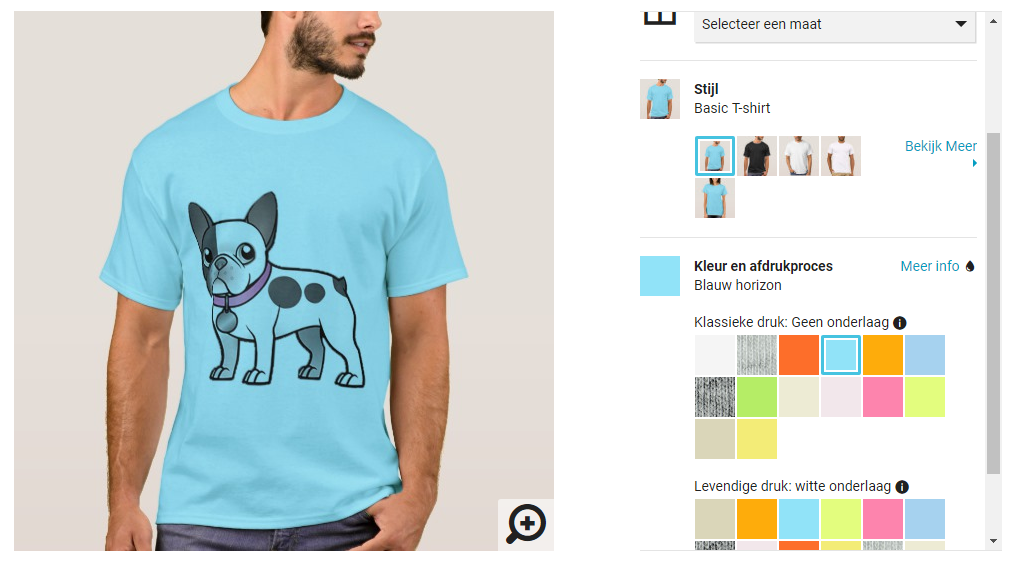
Nadat je eenmaal een keuze hebt gemaakt welke afbeelding je wilt uploaden, zal deze tevoorschijn komen in het ontwerpgebied, alsmede hoe het eruit zal komen te zien op het product in een preview venster. (Zie onderstaand)
Als je problemen hebt met het uploaden van een afbeelding, kijk dan hier.
HET BEWERKEN VAN AFBEELDINGEN IN DE DESIGNTOOL
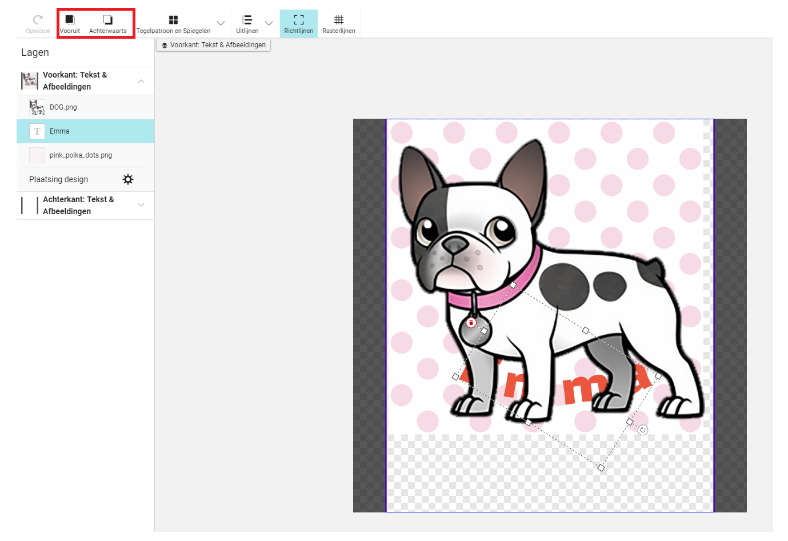
BELANGRIJK: Je moet binnen het design in het ontwerpgebied klikken om aan de rechterzijde van het scherm de opties te zien te krijgen waar je uit kunt kiezen voor bij het ontwerpen. (Zie onderstaand)
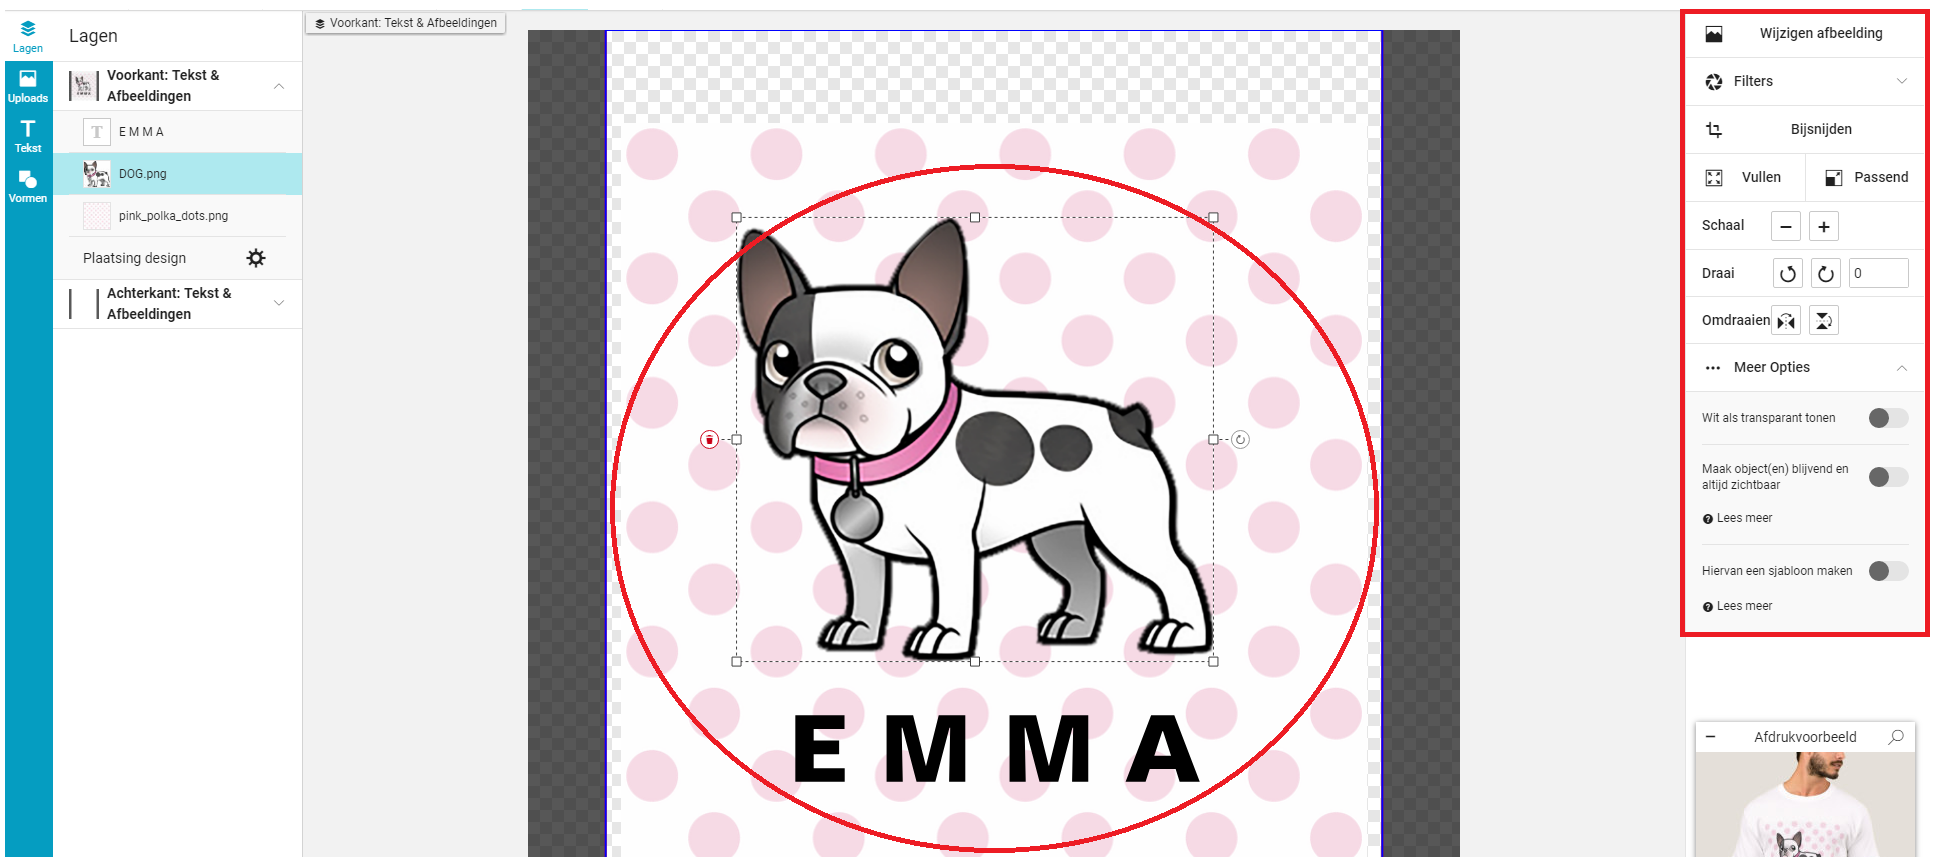
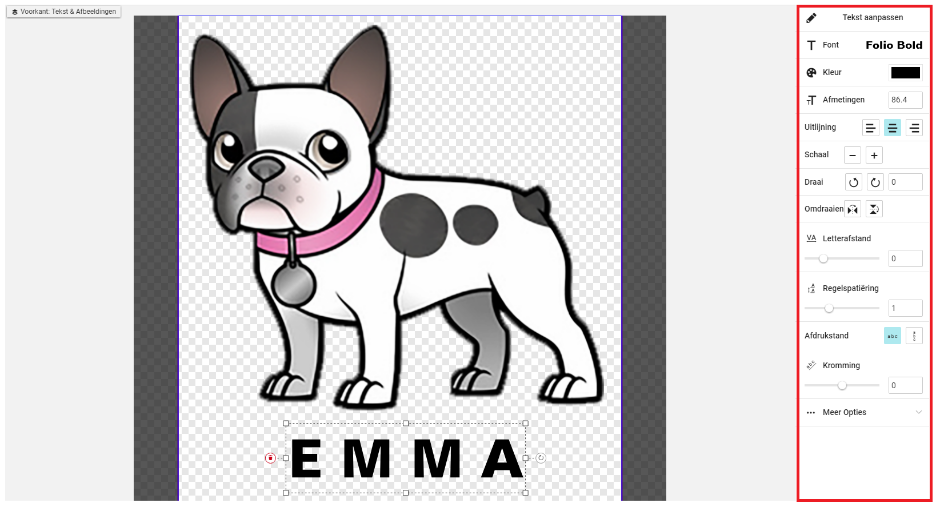
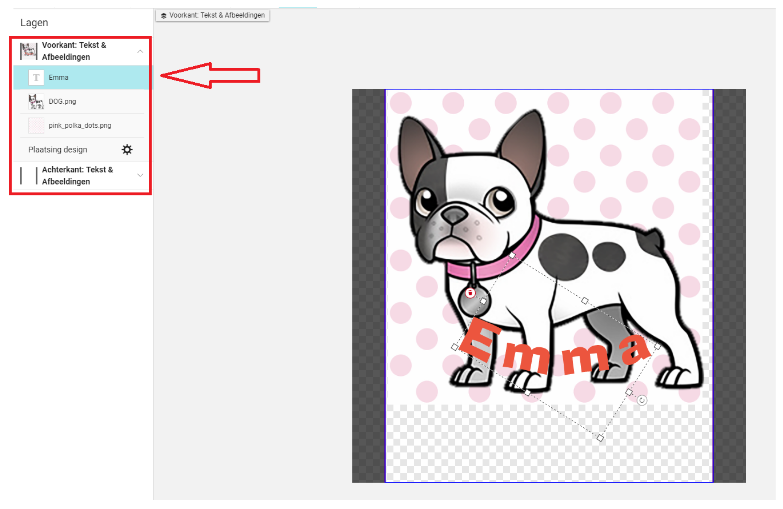
Je kunt tevens meerdere designelementen toevoegen aan je ontwerpgebied. Zoals je op de onderstaande afbeelding kunt zien, er zijn drie componenten waar het design uit bestaat: de hond, de roze stippen en de tekst 'Emma' op iedere afzonderlijke laag.
Het filteren van een afbeelding
Je kunt het 'filter' aanpassen van de laag die je uitlicht. (Zie onderstaand)

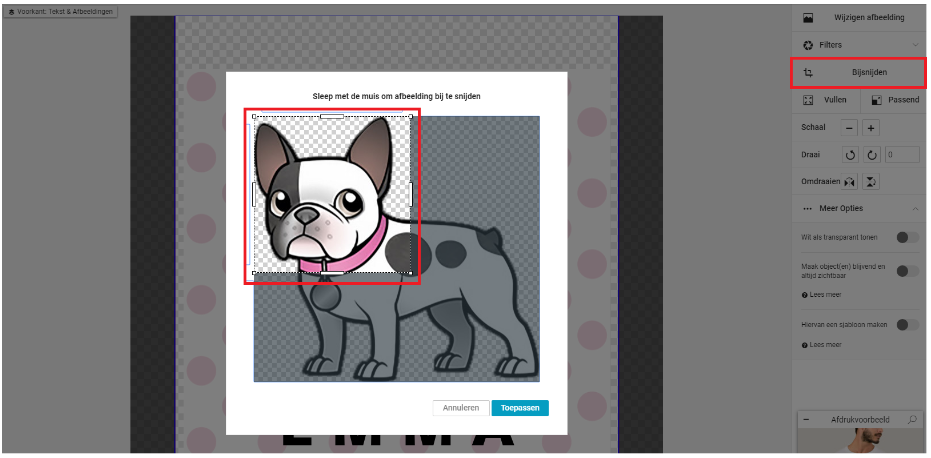
Het bijsnijden van een afbeelding
Je kunt de afbeelding bijsnijden van de laag die je hebt geselecteerd. (Zie onderstaand)
'Vul' het ontwerpgebied met een afbeelding
Je kunt ervoor kiezen om je design het gehele ontwerpgebied te laten 'vullen', tot en met de aflooplijn. Als een afbeelding wijder of groter is dan de afmetingen van het uiteindelijke design gedeelte op het product, dan kan het gebeuren dat het design wordt bijgesneden.
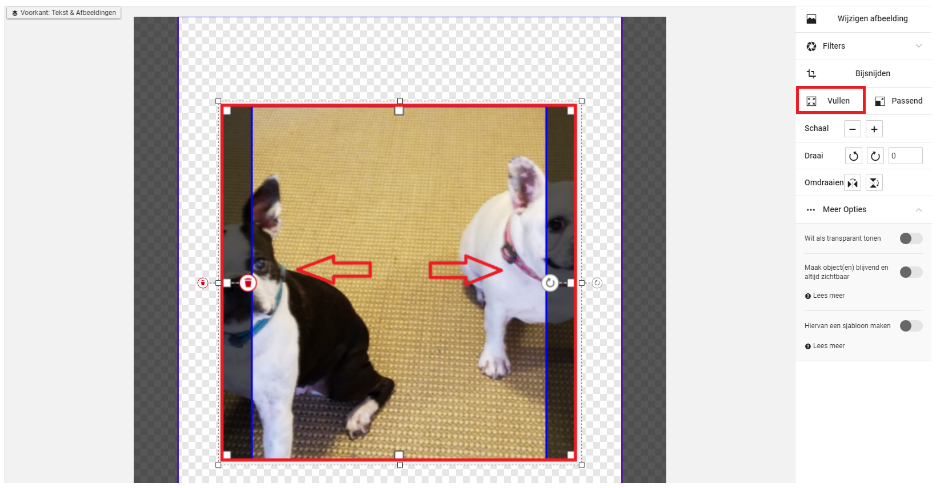
*Let op: De bovenstaande afbeelding heeft andere afmetingen dan het ontwerpgebied en dus is de afbeelding bijgesneden.
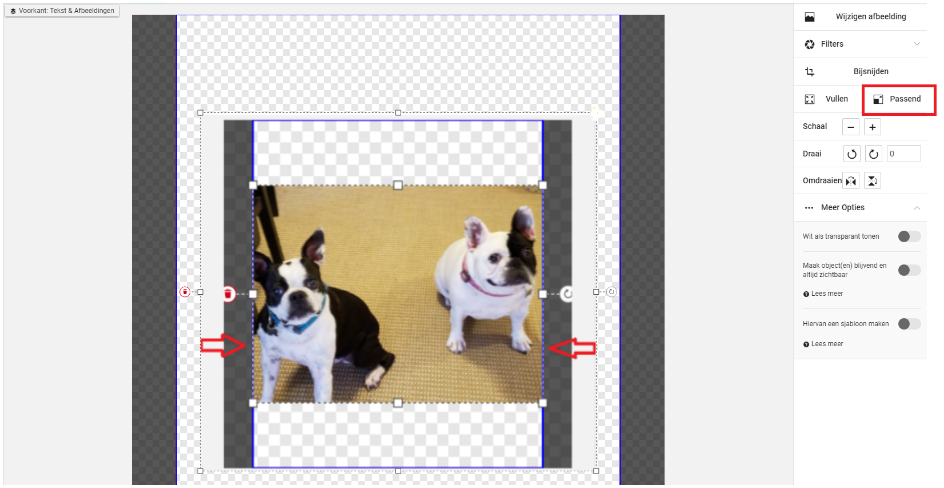
Laat een afbeelding passen binnen het ontwerpgebied
Je kunt er ook voor kiezen om je afbeelding te laten passen binnen het ontwerpgebied. Passend maken betekent dat de langste kant van de afbeelding tot de verticale of horizontale afdruklijn zal lopen.
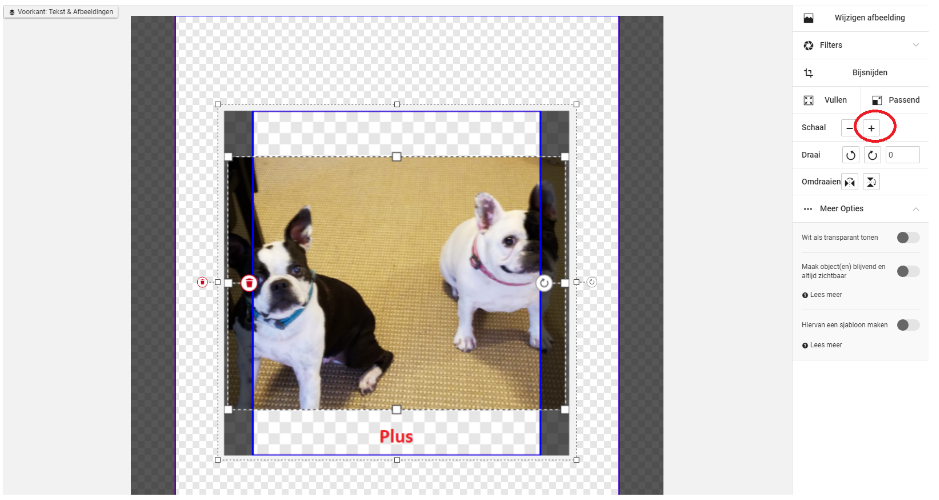
De schaal van een afbeelding bepalen
Je kunt de schaal van je afbeelding kleiner maken middels het gebruik van de 'min' (-) knop of groter met de 'plus' (+) knop. (Zie onderstaand)
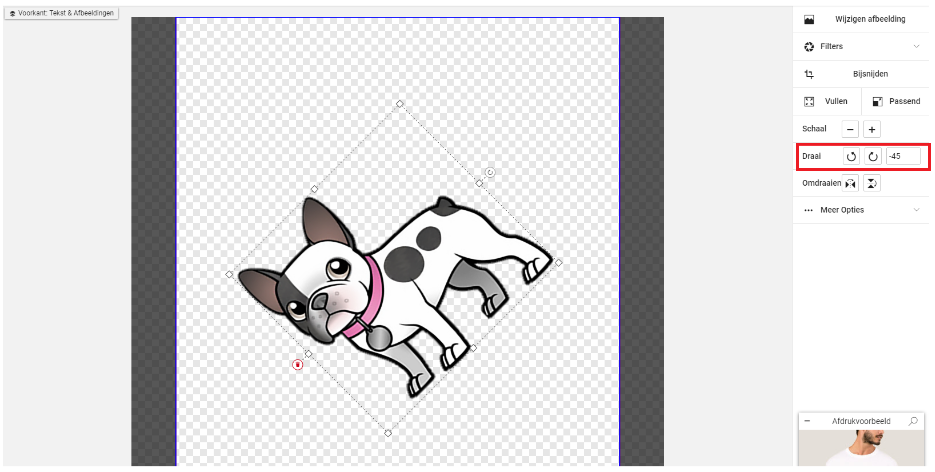
Het draaien van een afbeelding
Je kunt je afbeelding naar links of rechts 'draaien' of roteren met de pijltoetsen, of je kunt het meer exact bepalen en de gradatie invoeren. (Zie onderstaand)
Het omdraaien van een afbeelding
Je kunt je afbeelding ook 'omdraaien'. Met de linkerknop kun je het design horizontaal omdraaien - dus wat links was wordt rechts en vice versa. (Zie onderstaand)
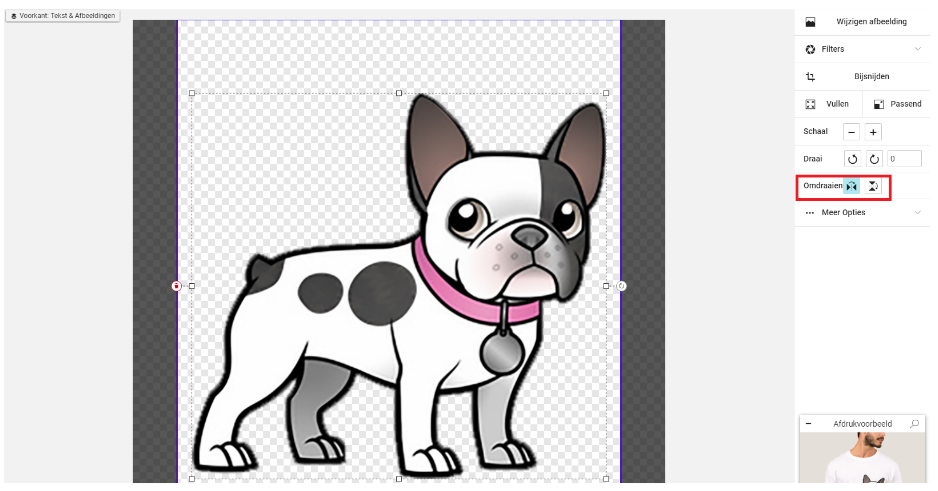
Je kunt het design ook verticaal omdraaien - dus wat eerst aan de onderkant te zien was, zal vervolgens aan de bovenkant te zien zijn. (Zie onderstaand)

Nog meer afbeelding opties
Onder 'Meer Opties' kun je 'Wit als transparant' tonen. Dat betekent, net zoals bij je printer thuis, dat ons systeem witte gebieden van afbeeldingen verwerkt en weglaat. Dus als je ervoor kiest om je wit transparant te maken, dan kun je ervan uitgaan dat alle witte gebieden binnen je design de kleur overnemen van het product waar ze op zijn geplaatst. (Zie onderstaand)

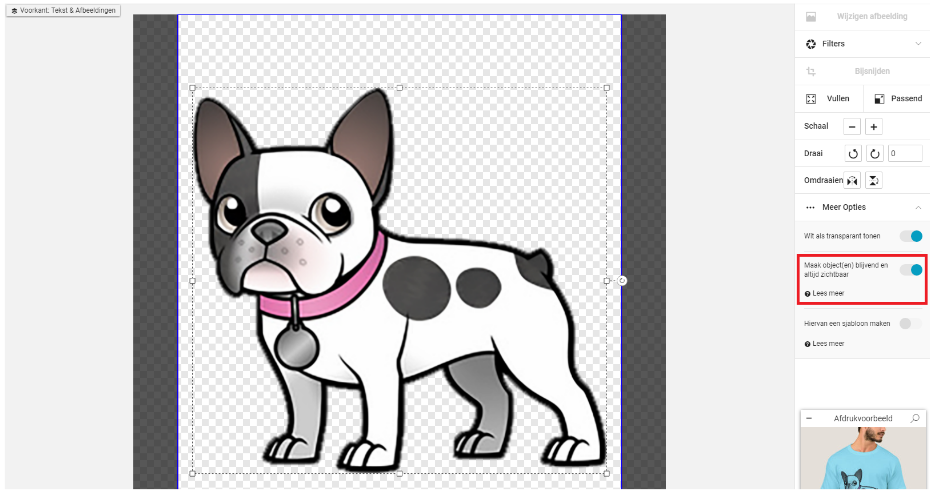
Maak object(en) permenant en altijd zichtbaar
Onder 'Meer Opties' vind je ook de optie 'Maak object(en) blijvend en altijd zichtbaar.' Dit betekent dat een klant je afbeelding kan verplaatsen of groter/kleiner maken op het product, maar ze kunnen het niet verwijderen van het ontwerpgebied. (Zie onderstaand)
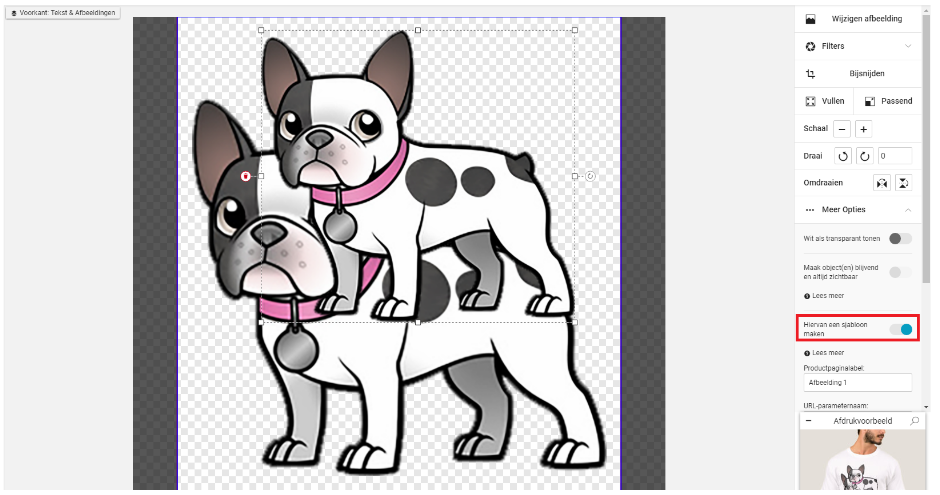
Maak een sjabloon object
'Hiervan een sjabloon maken' is een tool speciaal ontworpen voor gevorderde gebruikers die sjablonen voor andere gebruikers willen creëren om content aan toe te voegen. Klik hier voor meer informatie over deze functie.
HET WERKEN MET TEXT >
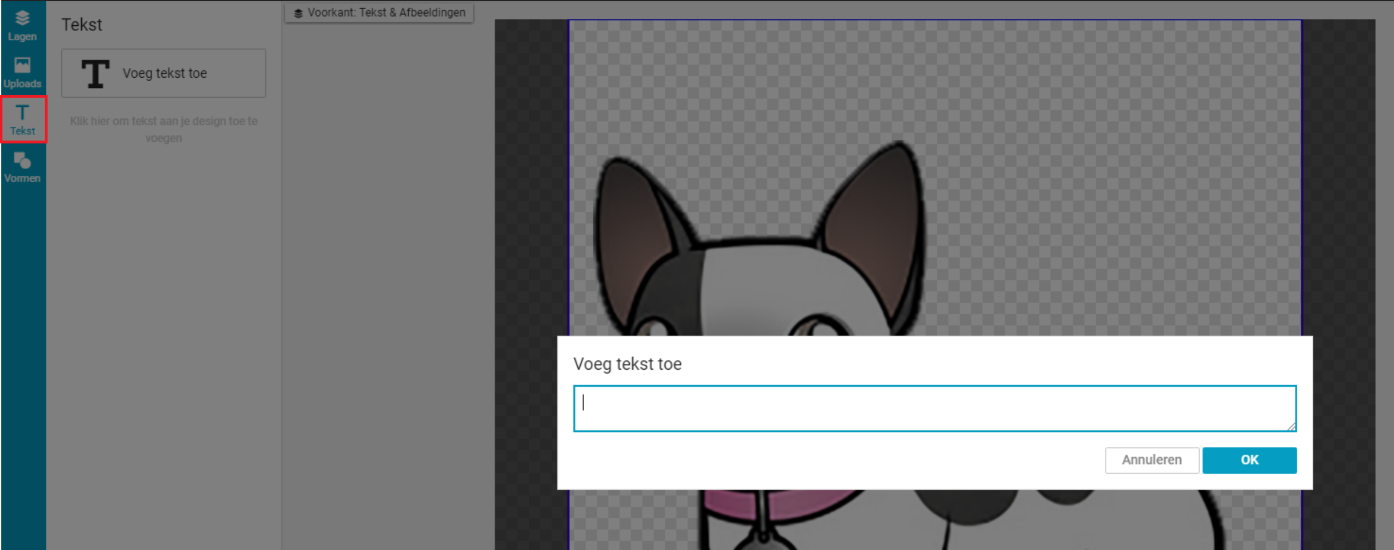
Om tekst aan het ontwerpgebied toe te voegen, klik op 'Voeg tekst toe' en voer je tekst in. (Zie onderstaand)
HET BEWERKEN VAN TEKST IN DE DESIGNTOOL
Belangrijk: Je dient te klikken binnen een tekstlaag in het ontwerpgebied om aan de rechterzijde te zien op welke wijzen je de tekst kan bewerken.
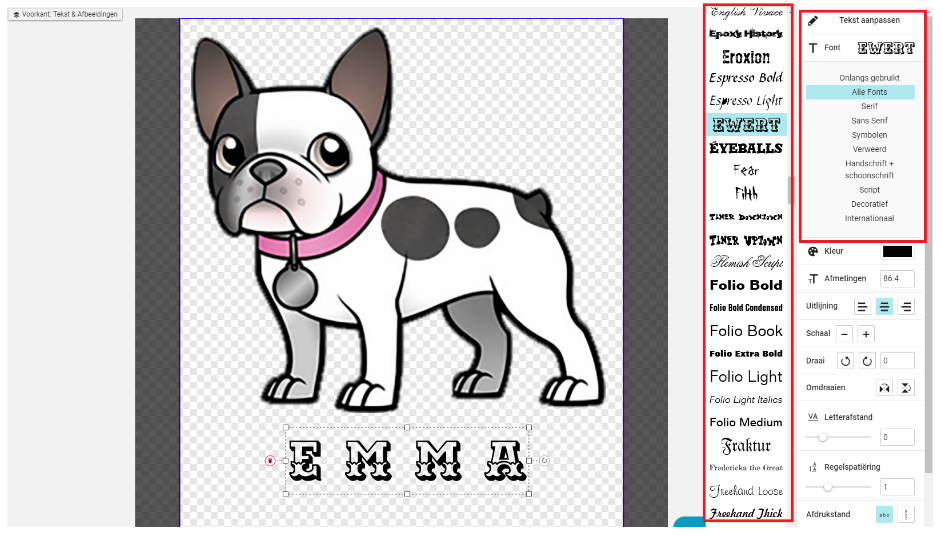
Het wijzigen van het font
Dit kun je aanpassen onder 'Font'. (Zie onderstaand)
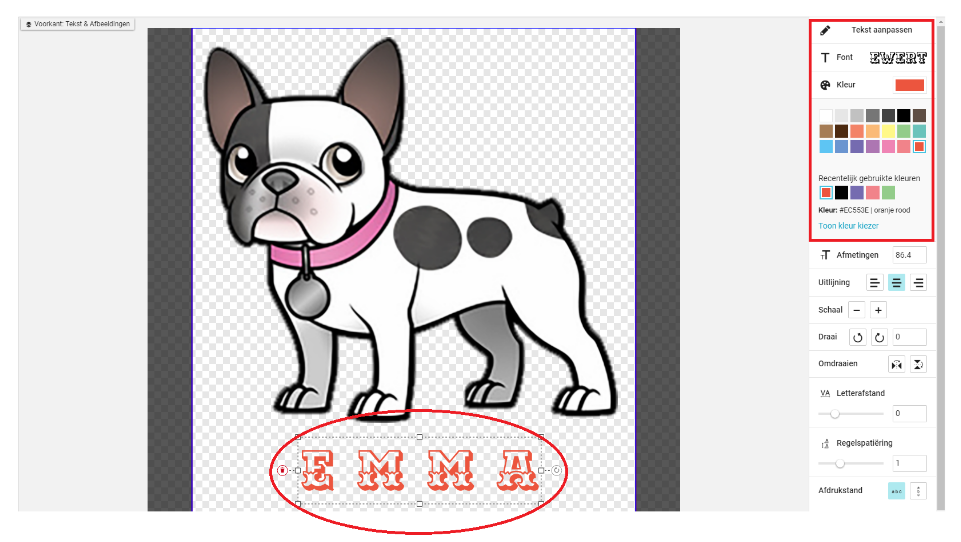
Het wijzigen van de kleur van het font
Je kunt ook de 'Kleur' van het font wijzigen. (Zie onderstaand)
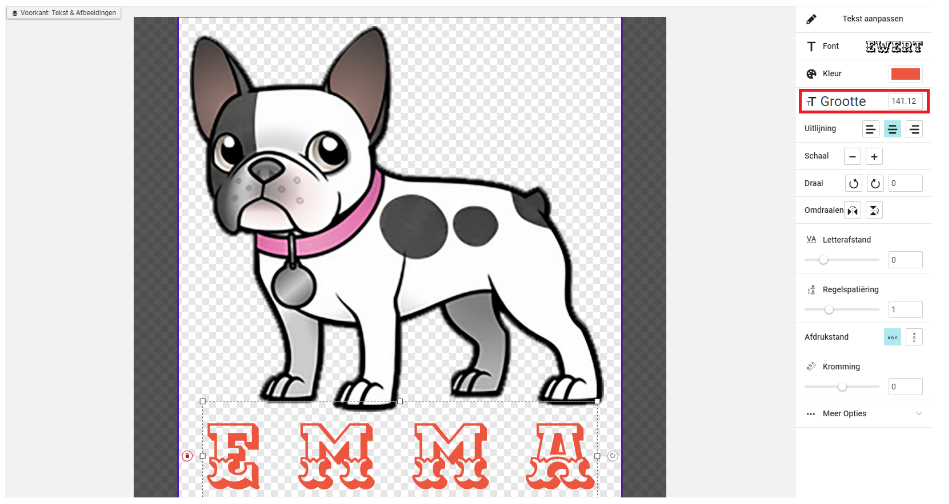
Het wijzigen van de maat van het font
Dit kun je wijzigen onder "Grootte". (Zie onderstaand)
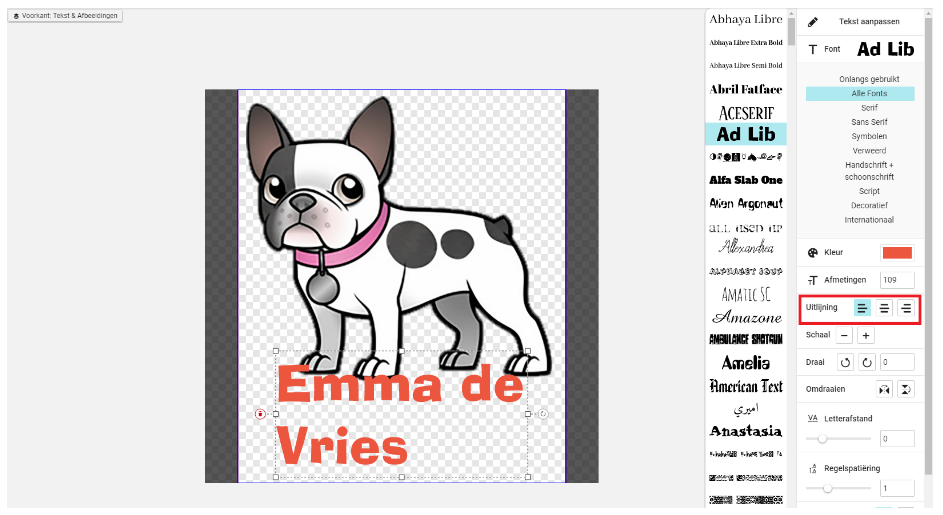
Uitlijnen van tekst
Met de 'Uitlijning' functie kun je de tekst naar links, in het midden of naar rechts plaatsen. (Zie onderstaand)
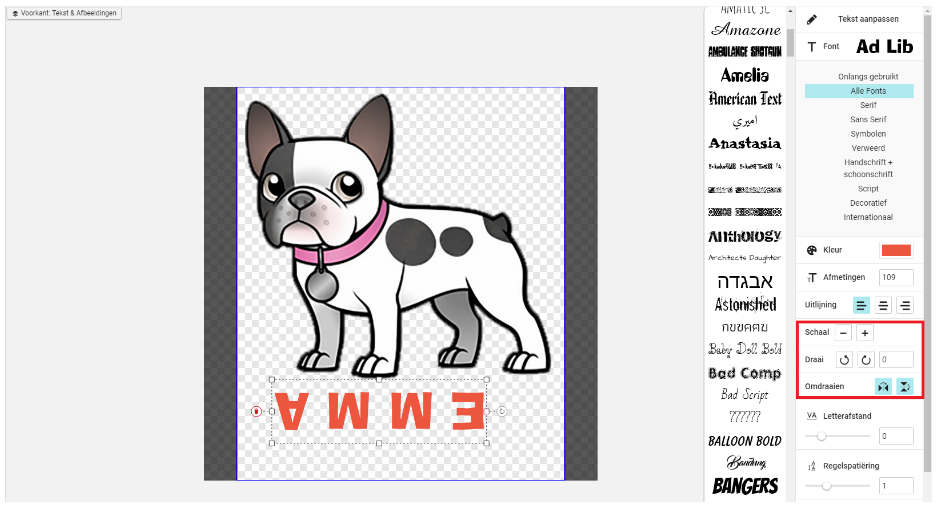
Het omdraaien en groter/kleiner maken van tekst
Je kunt de tekst op z'n kop zetten, wat draaien en groter/kleiner maken zoals we eerder beschreven als bij de afbeeldingen. (Zie onderstaand)
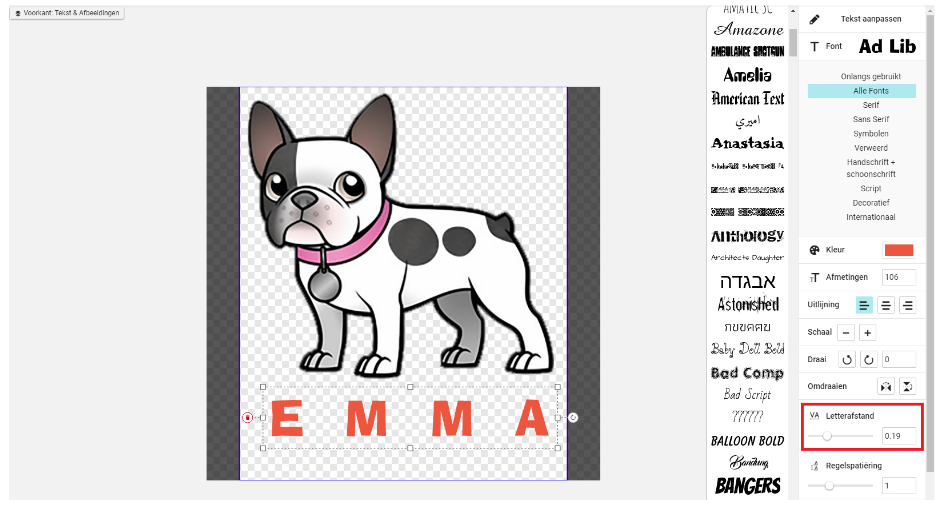
Letterafstand
Je kunt de onderlinge afstand tussen letters groter of kleiner maken met gebruik van de 'Letterafstand' functie. Schuif of voer een precies getal in en selecteer de afstand tussen de letters. (Zie onderstaand)
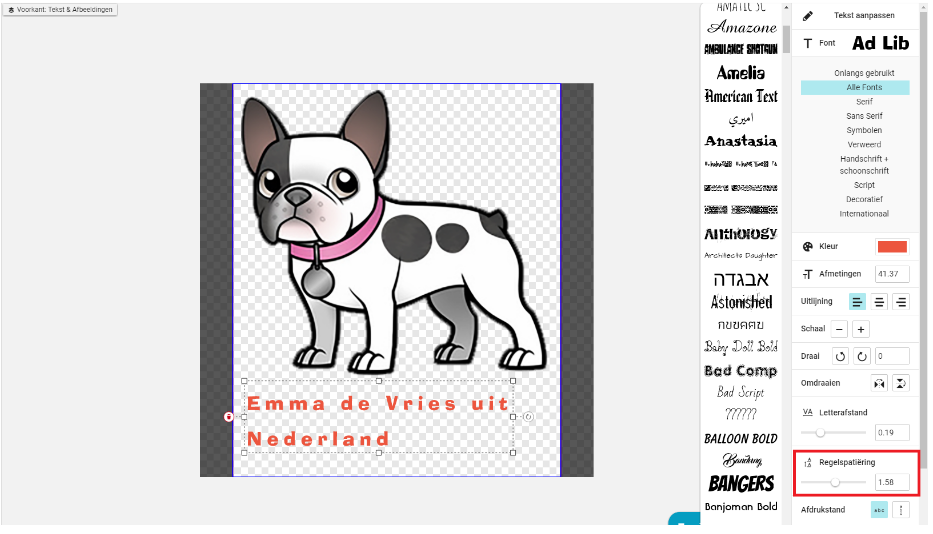
Regelspatiëring
Met de 'Regelspatiëring' kun je de afstand tussen de regels onderling bepalen. Schuif of voer een precies getal in en selecteer de afstand tussen de regels. (Zie onderstaand)
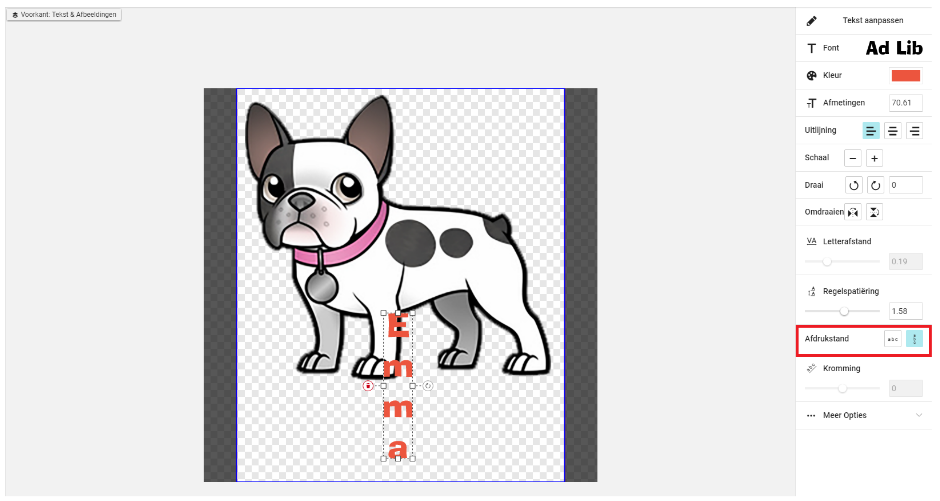
Richting tekst bepalen
Je kunt met de 'Afdrukstand' ook de richting, horizontaal of verticaal, bepalen. (Zie onderstaand)
De tekst buigen
Met de 'Kromming' functie kun je de tekst laten buigen - omhoog of omlaag. Schuif of voer een precies getal in om de mate van kromming te bepalen. (Zie onderstaand)

Onder 'Meer Opties' kun je met de tekst doen zoals we eerder hebben besproken bij de afbeeldingen. Zie bovenstaande uitleg hoe het werkt voor de afbeeldingen en pas het toe op de tekst.
AANVULLENDE DESIGNTOOL FUNCTIES
Lagen
Op onderstaande afbeelding zie je drie lagen: de hond, de roze stippen en de tekst 'Emma'.
Als je de volgorde van de lagen wilt wijzigen, dan kun je ze eenvoudig verplaatsen en de ene laag boven de andere plaatsen. (Zie onderstaand)
Achter/Voren
Je kunt de lagen ook naar voren of achteren plaatsen, afhankelijk van de laag die je hebt geselecteerd en/of aangeklikt binnen het ontwerpgebied. (Zie onderstaand)
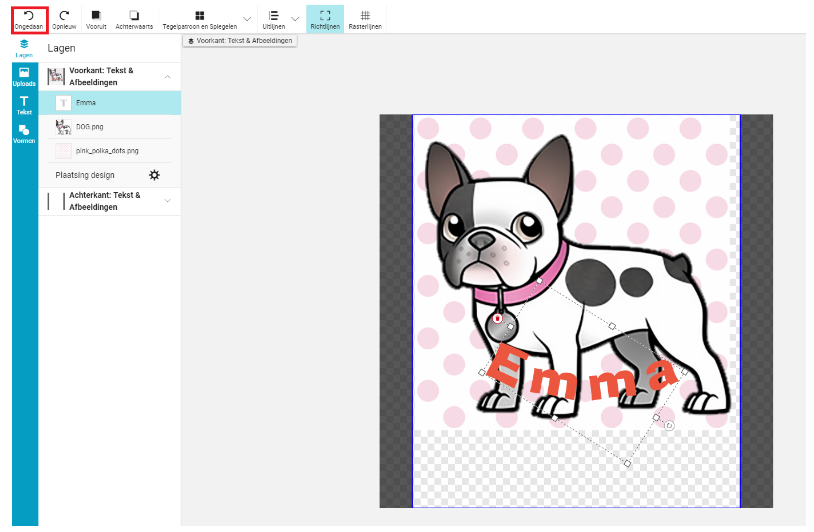
Ongedaan maken
Als je een foutje maakt of je wilt even bekijken hoe je design eruit zag voor je die ene verandering maakte, klik dan op 'Ongedaan' maken. (Zie onderstaand)
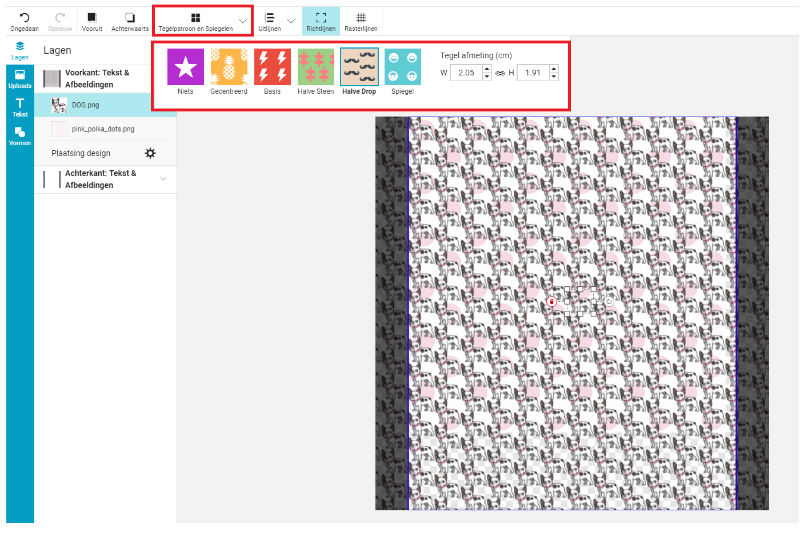
Tegelpatroon
Als je van een bepaald element van je design een patroon wil maken, dan kun je dit op verschillende manieren doen. Je kunt ook de grootte bepalen van het patroon. (Zie onderstaand)
Uitlijnen
'Uitlijnen' stelt je in staat om meerdere afbeeldingen op één lijn te brengen in verschillende configuraties.
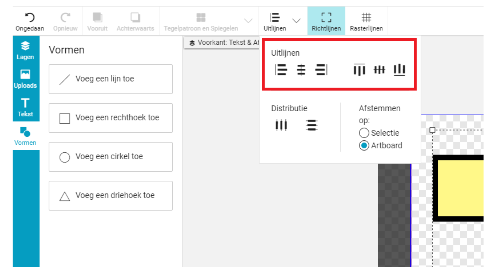
Als eerste, bepaal of je één laag met een andere laag op één lijn wil brengen of als je het wil toepassen op alle lagen binnen het ontwerpgebied of Artboard. (Zie onderstaand)
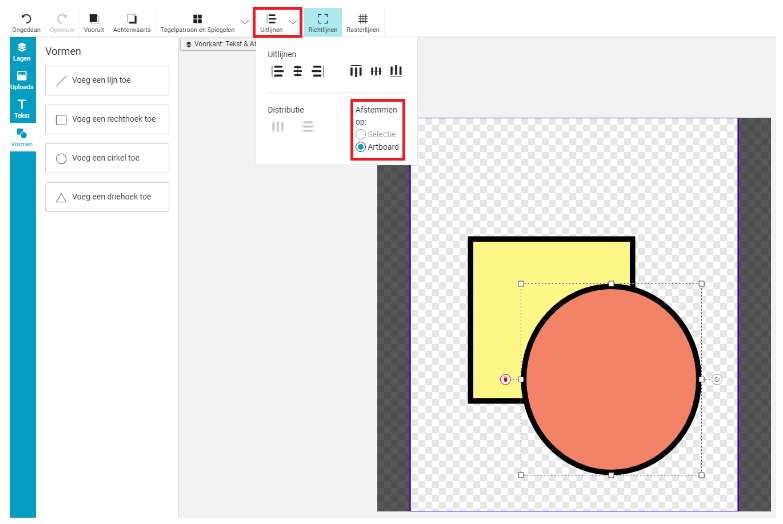
Vervolgens, stel dat je zes gekleurde vormen hebt die je graag netjes op een rijtje wil hebben. Geen probleem! (Zie onderstaand)

Goed, om te beginnen dien je de Control toets ingedrukt te houden en je cursor (pijltje) te gebruiken om op alle vormen te klikken, om er vervolgens één groep van te maken. Wanneer je eenmaal om alle vormen heen een stippeltjeslijn ziet , dan weet je dat het gelukt is. (Zie onderstaand)
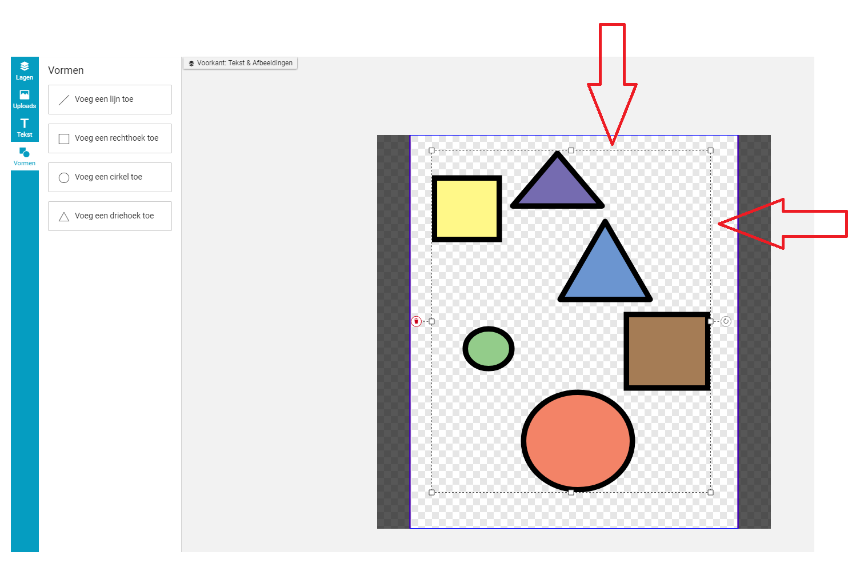
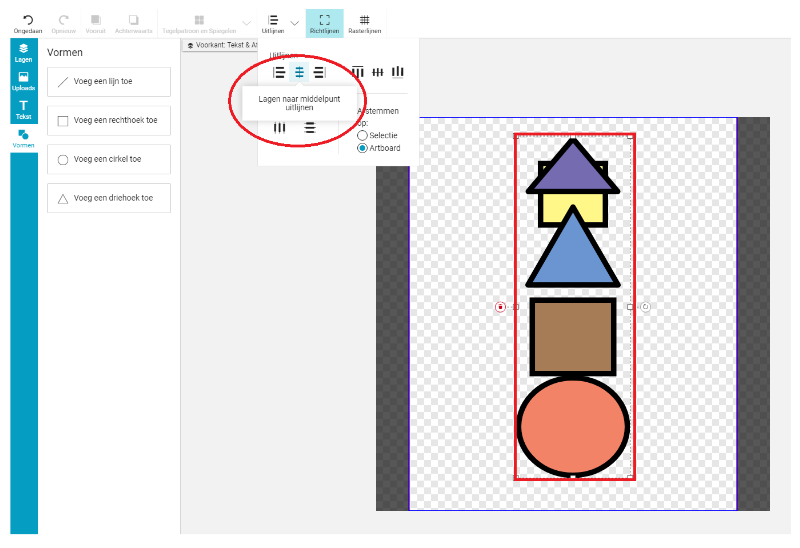
Vervolgens kun je ervoor kiezen om de objecten horizontaal of verticaal op één lijn te brengen. (Zie onderstaand)
Het volgende voorbeeld laat zien dat de vormen vertaal uitgelijnd zijn.
Distributie/verdeling
Je kunt tevens bepalen of je, horizontaal of verticaal, een afstand tussen de onderlinge objecten wil hebben. (Zie onderstaand)

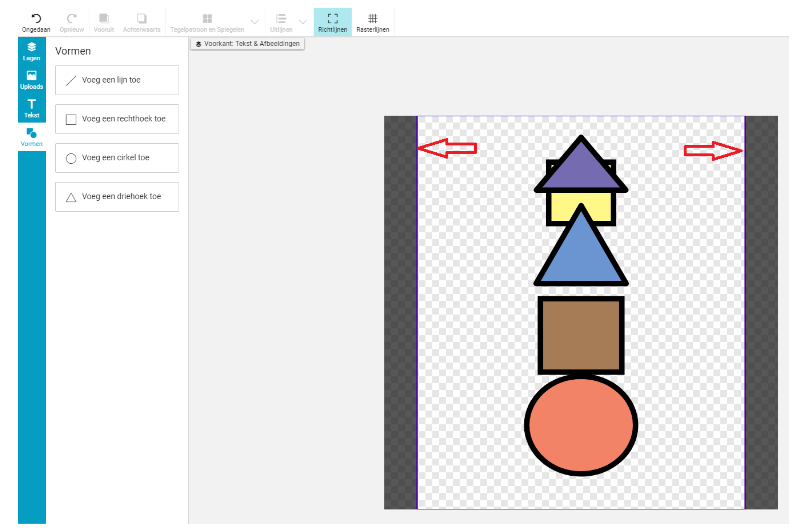
Richtlijnen
Het is een goed idee om bij het ontwerpen de 'Richtlijnen' erbij te hebben, zo weet je precies tot waar je kunt gaan bij het ontwerpen. Alles van het design wat voorbij de blauwe lijnen komt, loopt het risico om te worden afgesneden bij de uiteindelijke afdruk.
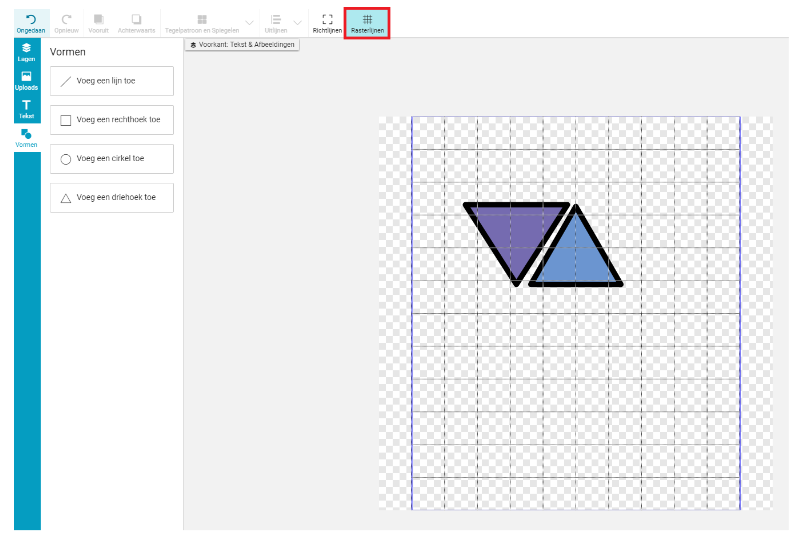
Rasterlijnen
Zet 'Rasterlijnen' aan voor hulp bij het bepalen van de plaatsing van objecten binnen je ontwerpgebied. (Zie onderstaand)
Veelgestelde vragen over afbeeldingen: geaccepteerde afbeeldingsformaten, kleurprofielen en meer
Voor meer designer specifieke informatie wat betreft het creëren van afbeeldingen, formaten en specificaties, klik hier.
Om onze volledig design richtlijnen voor alle Zazzle producten te bekijken, klik hier.